Today I tear apart a vintage Guild HB-1 pickup. Why would I do such a thing to one of my favorite pickups? For the same reason that I used to take the phones apart when I was a kid in the ’70s: to see how it works.
Don’t worry, this pic of a pure unmolested ’70s Guild HB-1 in mint condition with its unused ring, perfect springs and screws is not the pickup I dismantled. Doing that would make me a monster.
For this discussion I have sourced a Guild HB-1 that’s had its cover removed and came to me in an inoperable state. If worse comes to worse, then I lost a few bucks buying a broken pickup but I documented its autopsy for science. That’s what this is; this is science.
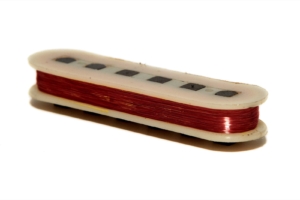
I’ve always thought that a Guild HB-1 with its cover removed is an ugly thing. While Dimarzios had sexy black or cream colored bobbins back in the day, the Guild bobbins are sort of a “you shouldn’t have taken the cover off” shade of off-white. Additionally, the slugs on a Guild HB-1 are square which, when coupled with the icky color of the bobbins, makes the guitar look dumb, at least in my opinion, and since I’m the one with the soapbox, dammit, they look dumb.
People removed the covers because they didn’t like the tone and were trying to get rid of parasitic capacitance. That, or they thought it would look cool with the cover off. Looking dumb in the pursuit of tone is good. Looking dumb in the pursuit of looking cool is dumb. So sayeth GAD.
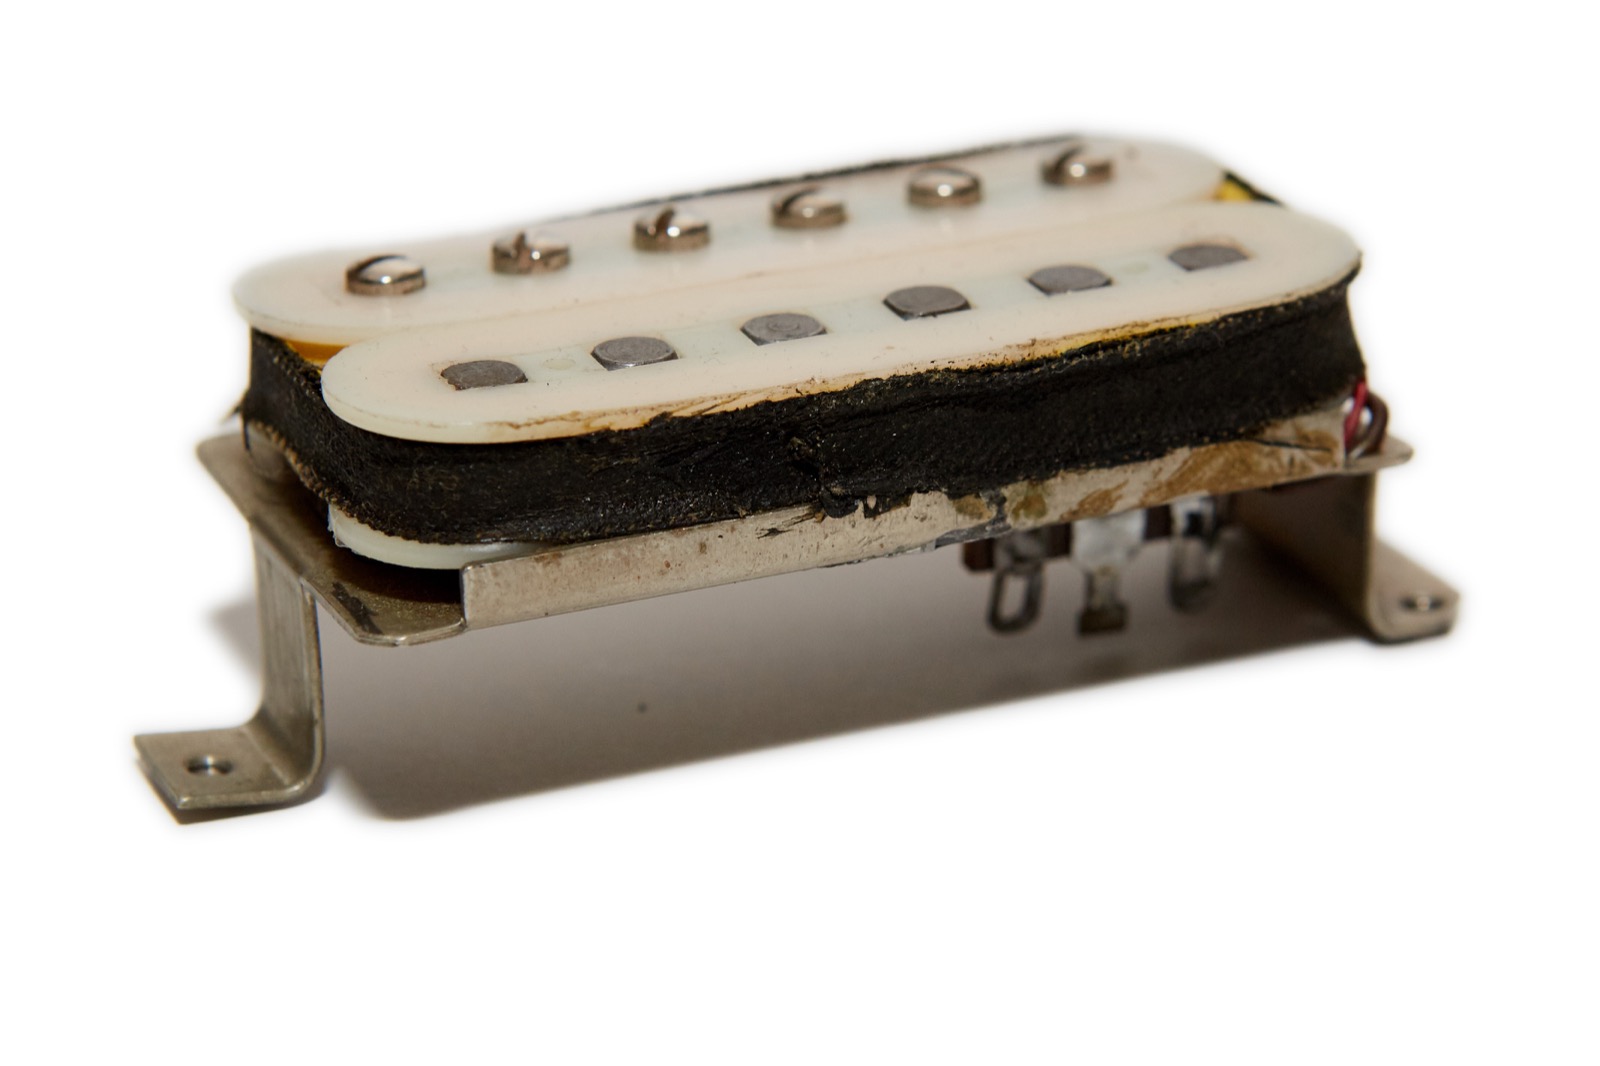
The pickup coils are covered with a black fabric type of tape, as are most coils from most pickup winders. This tape is usually there to help protect the tiny wires which are very easy to break, though I’m not so sure that was the purpose here because on these pickups the black tape covered more tape.
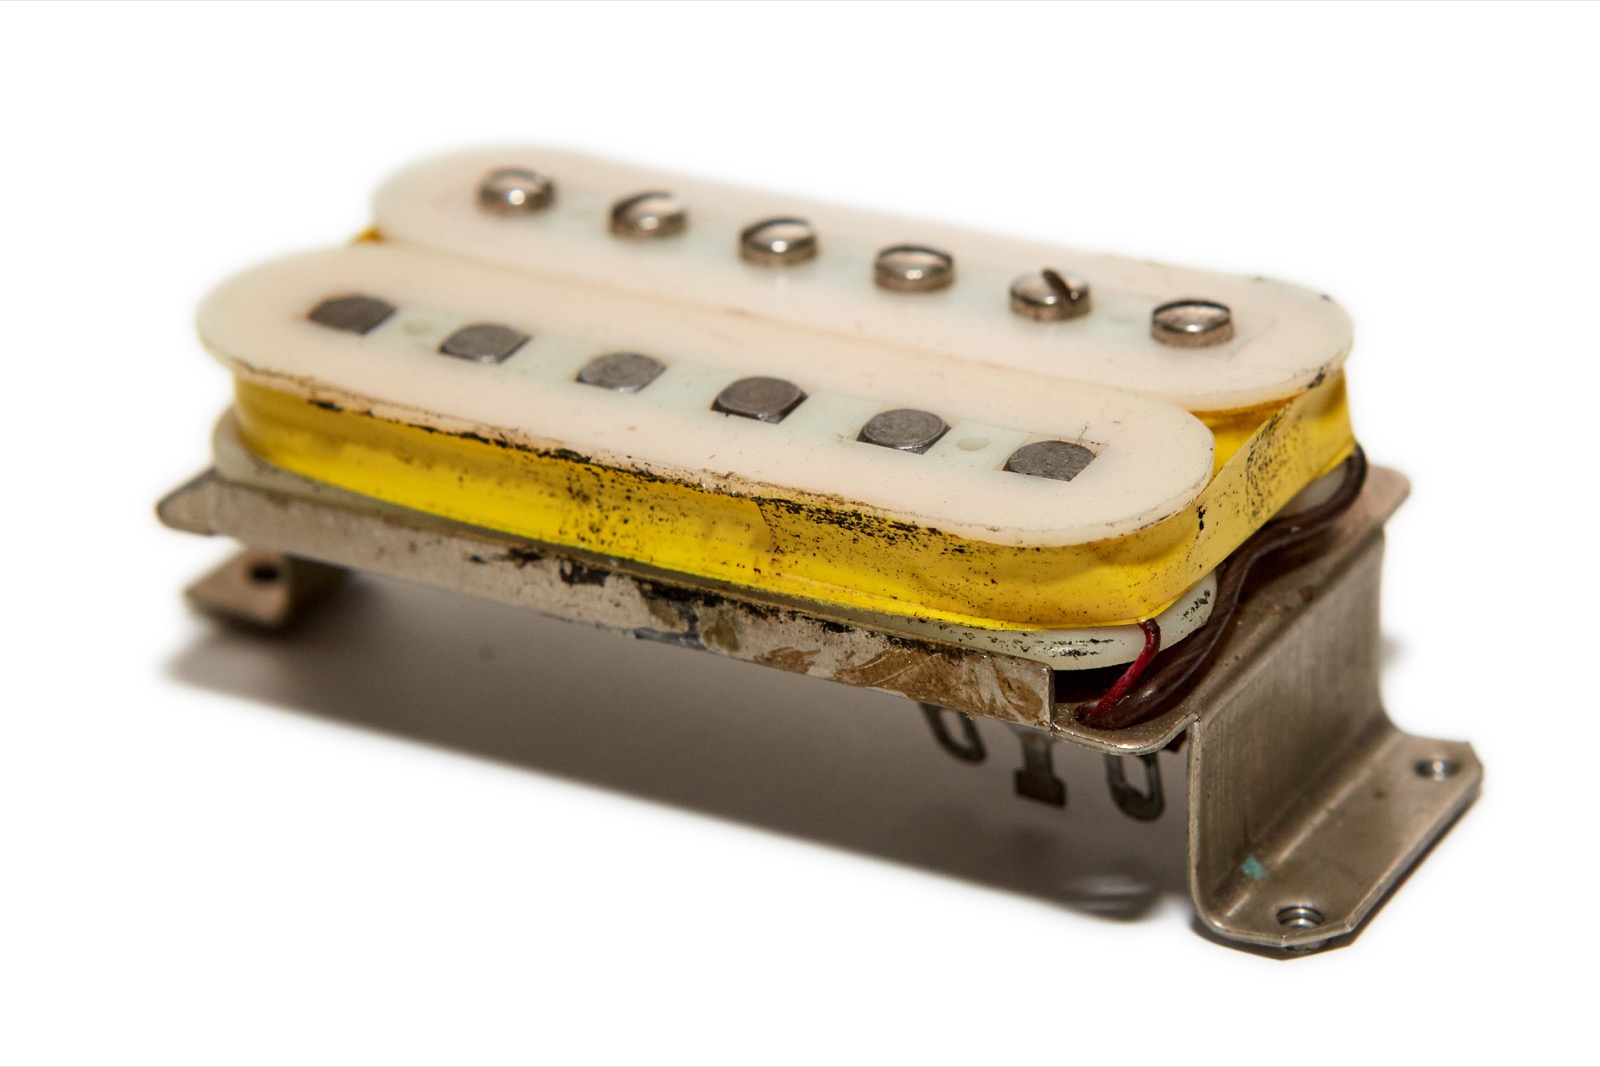
Upon unwinding the black tape I was greeted with a liberal application of yellow tape, this appearing to be more like electrical tape in look and feel. If you thought the pickup looked great with the cover off, well then surely you must appreciate the fisherman’s raincoat yellow of the new tape. I mean, come on, that right there would look killer in a bright pink ’80s shred machine, don’t you think?
Undaunted, I got my tiny cutters and slowly and carefully cut away the very sticky yellow tape. This was not an easy task because this tape is actually intertwined with the last strand of magnet wire where it is soldered to the red, black, and white connection wires. This yellow tape is no doubt designed as a sort of barrier to prevent unwanted electrical conduction while also protecting the fragile wire. The small remaining bit of yellow you see is where the black wire is secured to the magnet wire. If you zoom in you’ll see white wire which is the connection between the bobbins. The short white wire is only about an inch long and is stuffed between the coils and taped down to keep it immobile.
The problem with the pickup turned out to be one of those tiny wires being broken. I decided to detach them all and proceed with the teardown. As we’ll soon see, this proved to be a mistake.
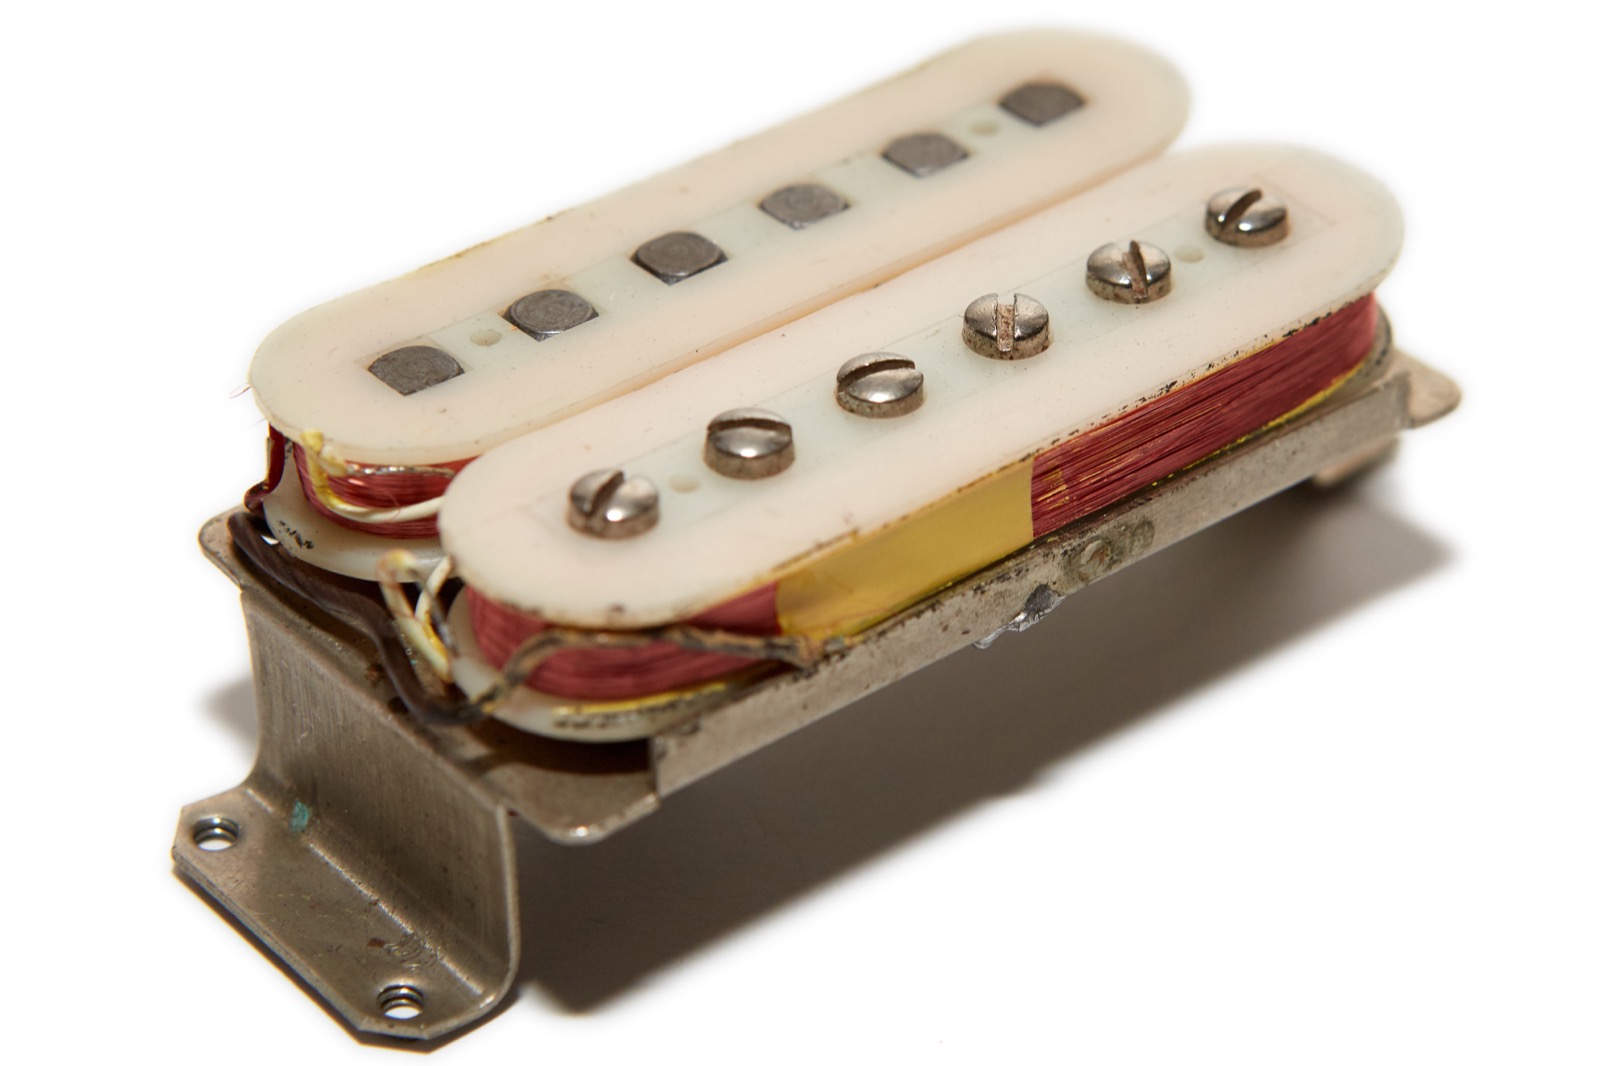
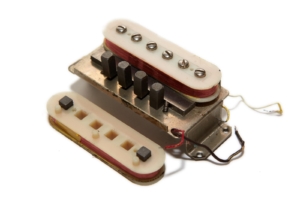
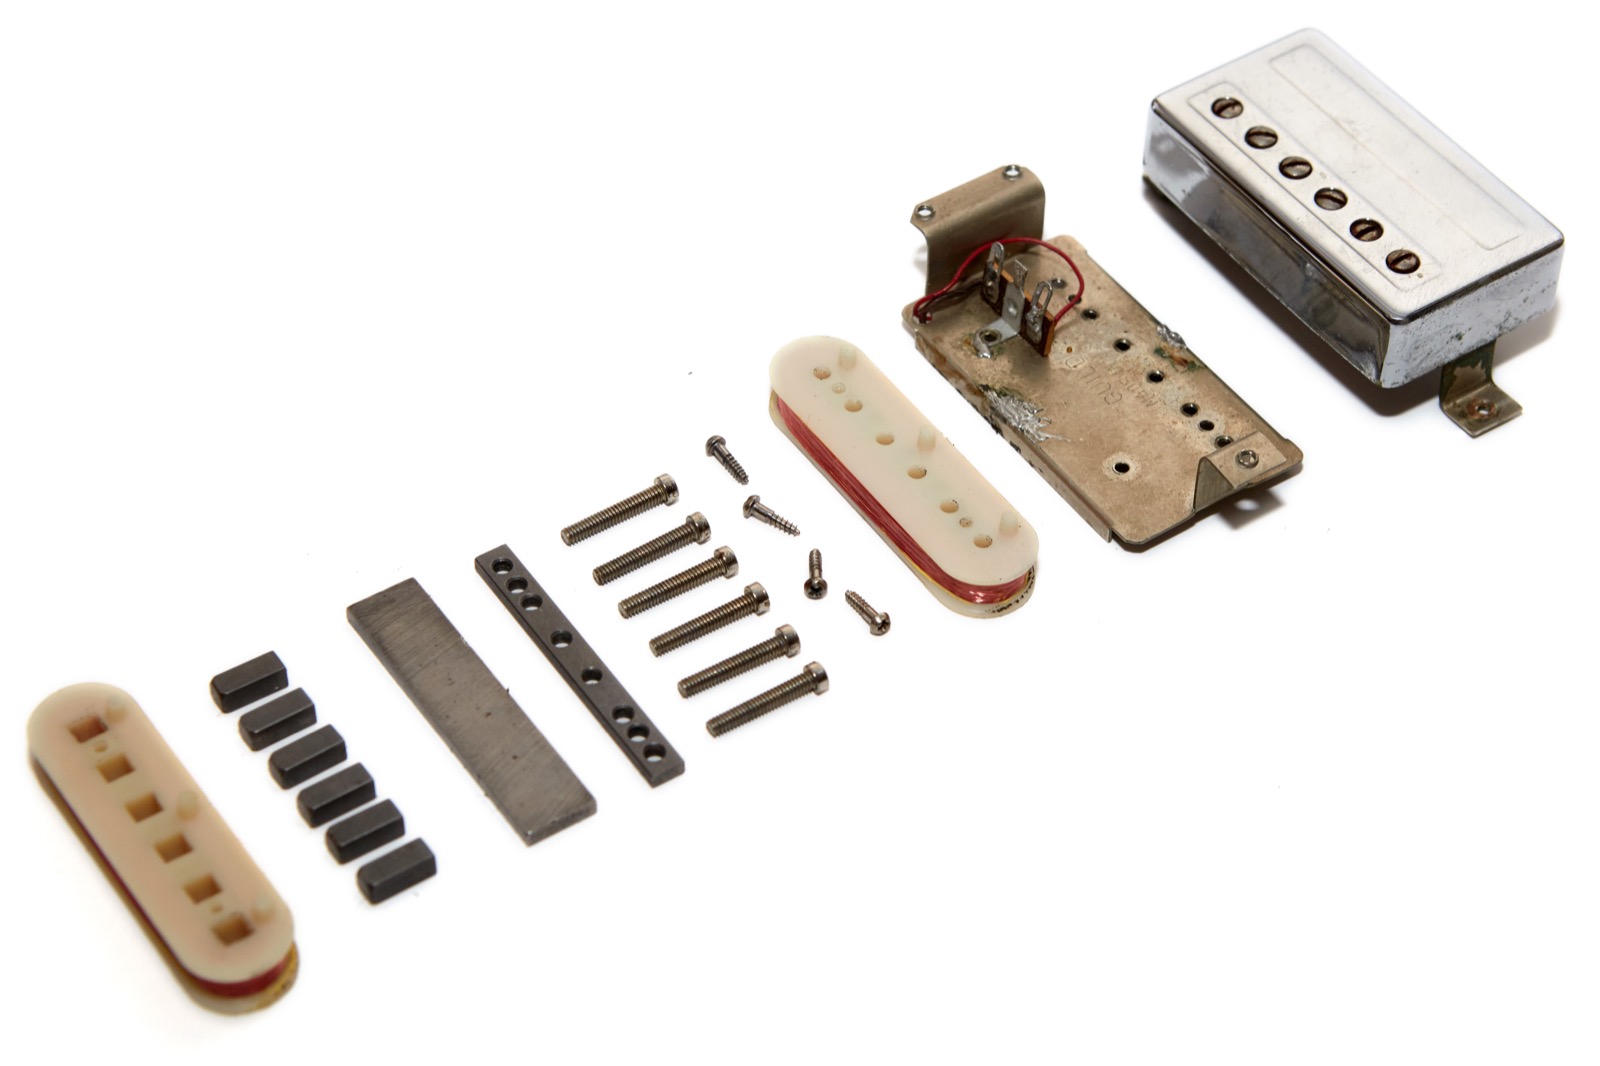
With all of the yellow tape carefully removed, I then got a tiny screwdriver and pulled the two screws holding the slug bobbin in place. With those screws loose enough the bobbin pulled right up leaving the center four slugs while the outer two remained stuck in the bobbin. With the bobbin screws loosened on both coils I was then able to slide the bar magnet out. Note that you do not need to pull the tape or take the bobbins off if you want to swap the magnets, though I’ve never heard of anyone doing a magnet swap on a Guild HB1.
With the magnet out I proceeded to further disassemble the pickup while taking pictures and saying a silent prayer for this Guild HB-1 that gave it’s life for science. Also I sort of started to feel like some sort of weird serial killer who collects pickups that all look and sound the same so that I could dissect them at my whim in my mad scientist laboratory. That’s when I realized it was time for a break so I went and made a sandwich. OK, I ate an entire bag of Tostito Hint of Lime chips. Don’t judge.
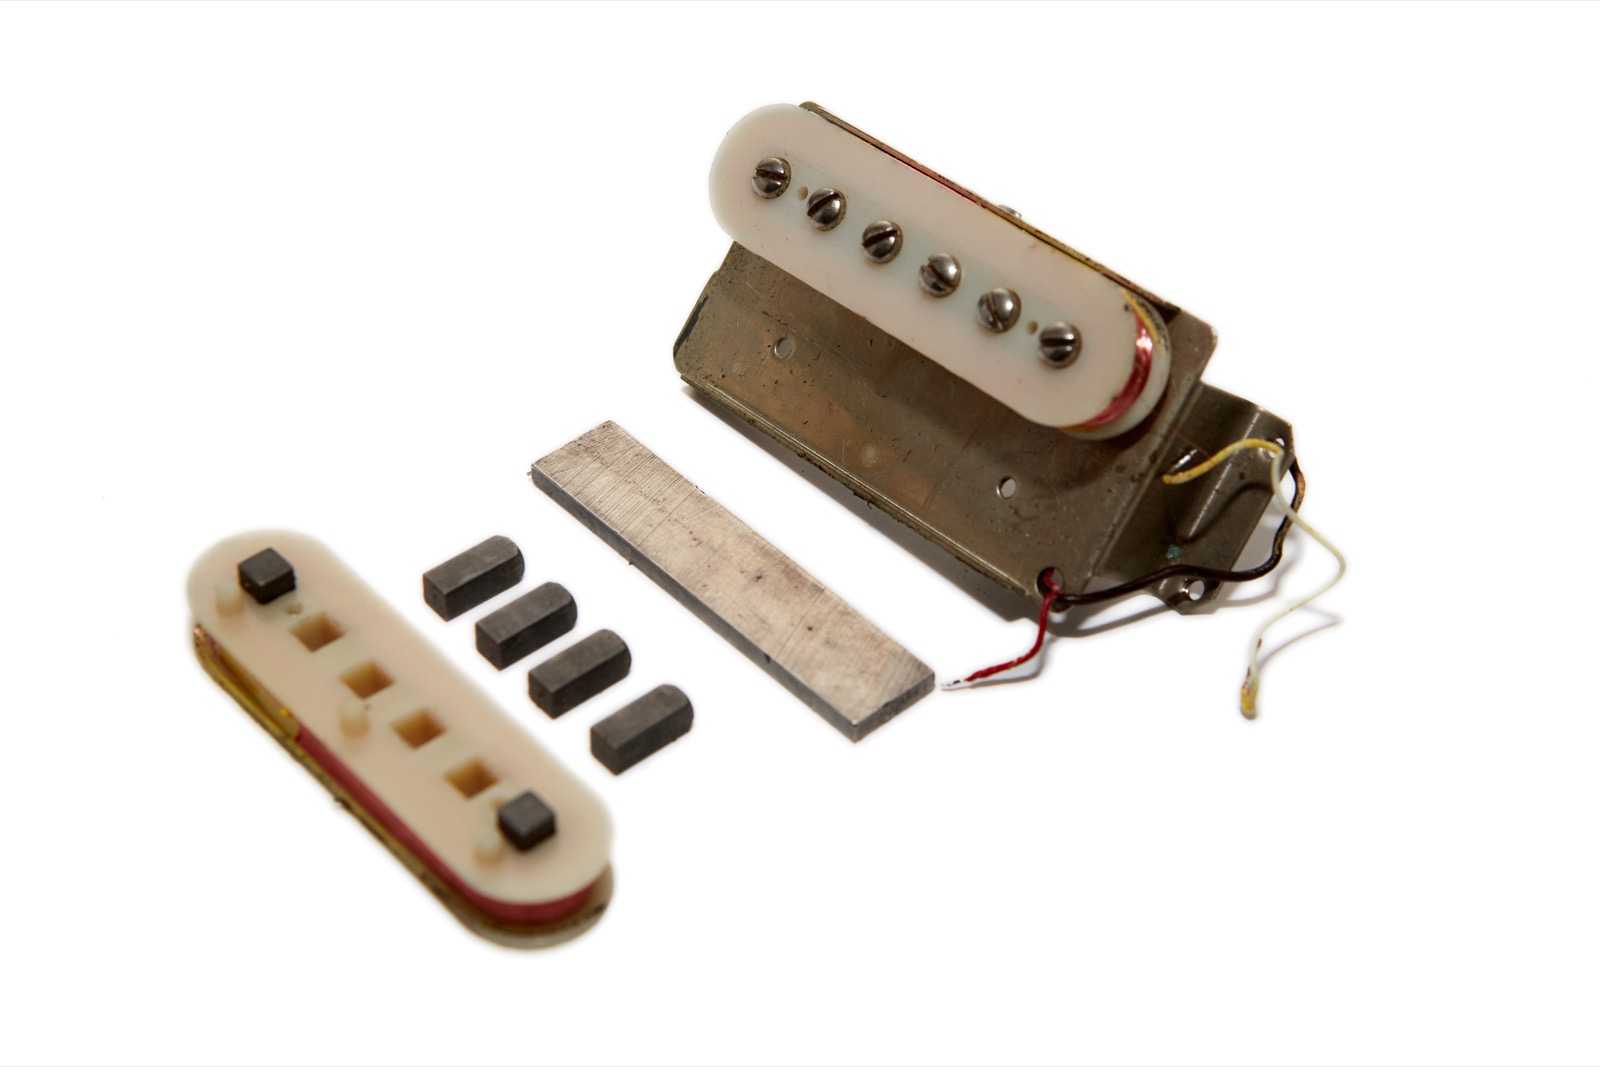
After my snack I took some more pictures of the parts as
a trophy scientific documentation of the process. Actually, I figure there isn’t a whole lot of documentation out there for these pickups so I might as well take pics of it all.
One of the things that’s always been a mystery for me is the type of magnet in these pickups. Having one in-hand and dissasembled, I set about figuring out how to tell what type of magnet it was.
The magnet in an HB-1 is most certainly not ceramic because those tend to be black while Alnico magnets tend to look like metal. This one looks like metal, so I’m going with Alnico since vintage guitar bar magnets are usually Alnico.
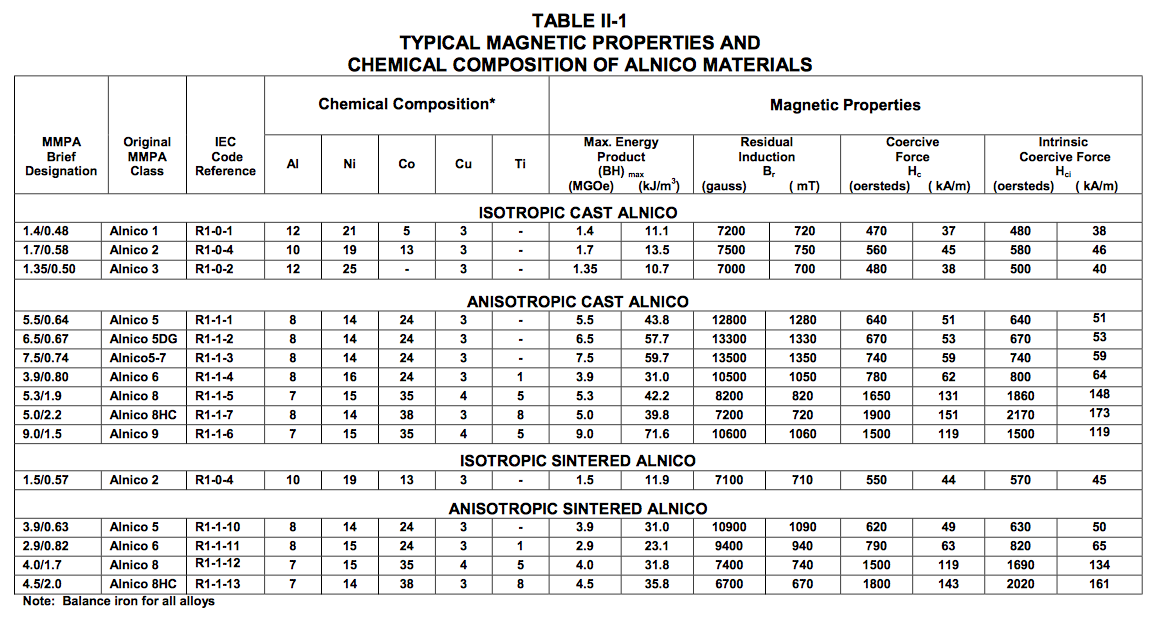
I then spent countless hours researching the magnetic properties of different magnet types. About the best document I found was this one, the relevant chart from it having been reproduced to the right. The Wikipedia article on Alnico is also pretty good. Here is another very cool article that I found on the subject. Here is another. Fair warning: those links are for people who really like magnets.
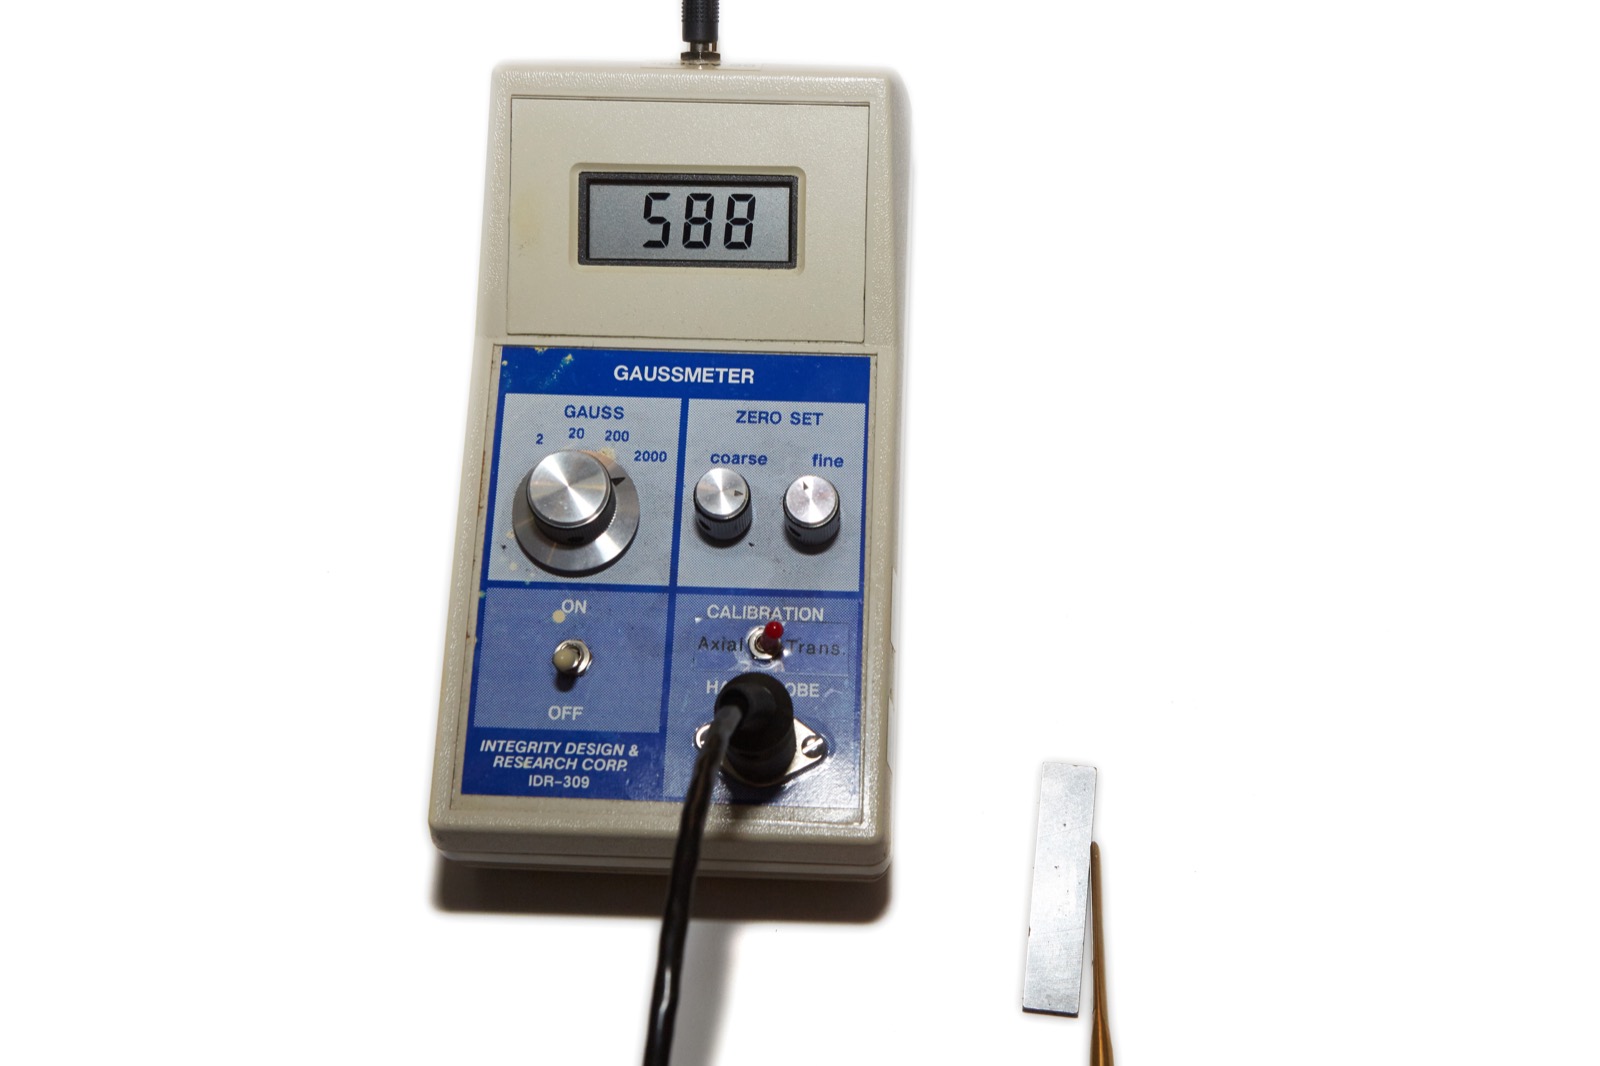
Within this chart are two columns entitled Gauss (under residual induction) and Oersteds (under Coercive Force). Gauss is a well known measure of magnetism and Oersteds are the unit used to measure how strong the pull of a magnet is which, yes, is a different thing. What I wanted to measure was Oersteds, and to do it I needed a Gauss meter. Those wacky scientists and their oddly named toys are always good for a laugh.
As luck would have it, I actually own a gauss meter. Actually I bought it specifically for my pickup experiments, so I guess luck had nothing to do with it but the fact remains that I have a Gauss meter so I whipped it out and measured the magnet using the transverse probe. The reading of a magnet like this will vary all up and down the side because magnets are basically magic. I got readings mostly between 500 and 700 for the magnet in this pickup.
Armed with my chart from the magnet people, I could see that an Alnico 2 magnet generally reads 560 Oersteds while an Alnico 5 magnet reads 640 which means…
Crap.
Basically my measurements are well within the deviation I’d expect from measuring a 45 year old magnet with an 20 year old Gauss meter that I got on eBay. If I had a known sample of an Alnico 2 with which to compare this magnet, perhaps I could form a better conclusion, but my scientific wild-ass guess is that the magnet is Alnico 5.
Unfortunately I broke the inbound lead wire on one of the bobbins when I dismantled it so I was unable to measure the resistance of each one individually. That means I don’t know if they’re wound differently from each other which kind of sucks because it might be part of the magic. I’ll have to be on the lookout for another vintage HB1 to torture and dissect analyze. Since the pickup was broken when I started I couldn’t get a measurement of the entire thing, either. This is why I’m not a scientist.
To make you feel better about me tearing apart a vintage Guild HB1, here’s a pair of new old stock Guild HB-1s in the original package that I scored on eBay for a ridiculously low price. Actually, I guess that just makes me feel better…
Even though my science was a miserable failure, I figured I’d post this article anyway because who wouldn’t want to see torn-apart gut pics of a Guild HB1 pickup? I know I would if I were you.


GAD please tell us the AWG of the wire used in the pickup coils, the bobbin and slug measurements etc. this will provide other potentially important properties of the pickup. BTW I think this is very important for the 100’s of us not so lucky to have scored a set of HB1’s. In medicine they say “the dead shall teach the living.” this is certainly the case here.
Thanks in advance
Your weakness as a scientist is certainly compensated for by your strength in writing and photography. The documentation of the HB1 sacrifice will certainly save the life other pickups as the potentially homicidal curiosity of likely pickup sadists could be abated.
Some time in the 1980’s, I took the cover off one of the pickups of my S-300 (just out of curiosity). My view of it’s appearance was pretty much the same as yours; the colour of the bobbins is just wrong and those square slugs look a little odd. To be honest, I always liked the look and sound of these pickups, with covers on, too much to seriously consider using them with the covers off.
Hello GAD
Do not be sorry for the broken wire of the coil that you could not measure – it was probably broken to begin with – the two coils are in series – and if one is kaputt you can not measure total impedance either.
And when you find that second dead pup – you can play dr Canavero – join them to live happily ever after.
Good reading – Nuuska
Can you tell me the correct/recommended pickup height for Guild HB1 pickups?
I don’t recall ever seeing a published document, but that doesn’t mean that one doesn’t exist. Like all pickups, I just adjust them to where they sound best.
Hello
Have you ever removed the cover from a new HB-1?
Thanks
Yes. 🙂
The material of the bobin is butyrate or plain plastic?
No idea