 I have an Ultimaker S5 as my only 3D printer, and it was a substantial investment for someone who doesn’t use it in a business environment. When I got it I desperately wanted the Material Station, but it was just too damn expensive, and that’s on top of the printer’s price which was also too damn expensive! I did buy the Air Handler, though, because my home office is small and I’m not a fan of breathing microparticles.
After a year of owning the S5, I finally decided to bite the bullet and purchase the Material Station. These are my impressions as someone who paid their own money for one and who’s actually used it non-stop for a couple of months, along with some of the things I’ve learned that surprised me due to none of the marketing material or paid reviews having covered them.
Introduction
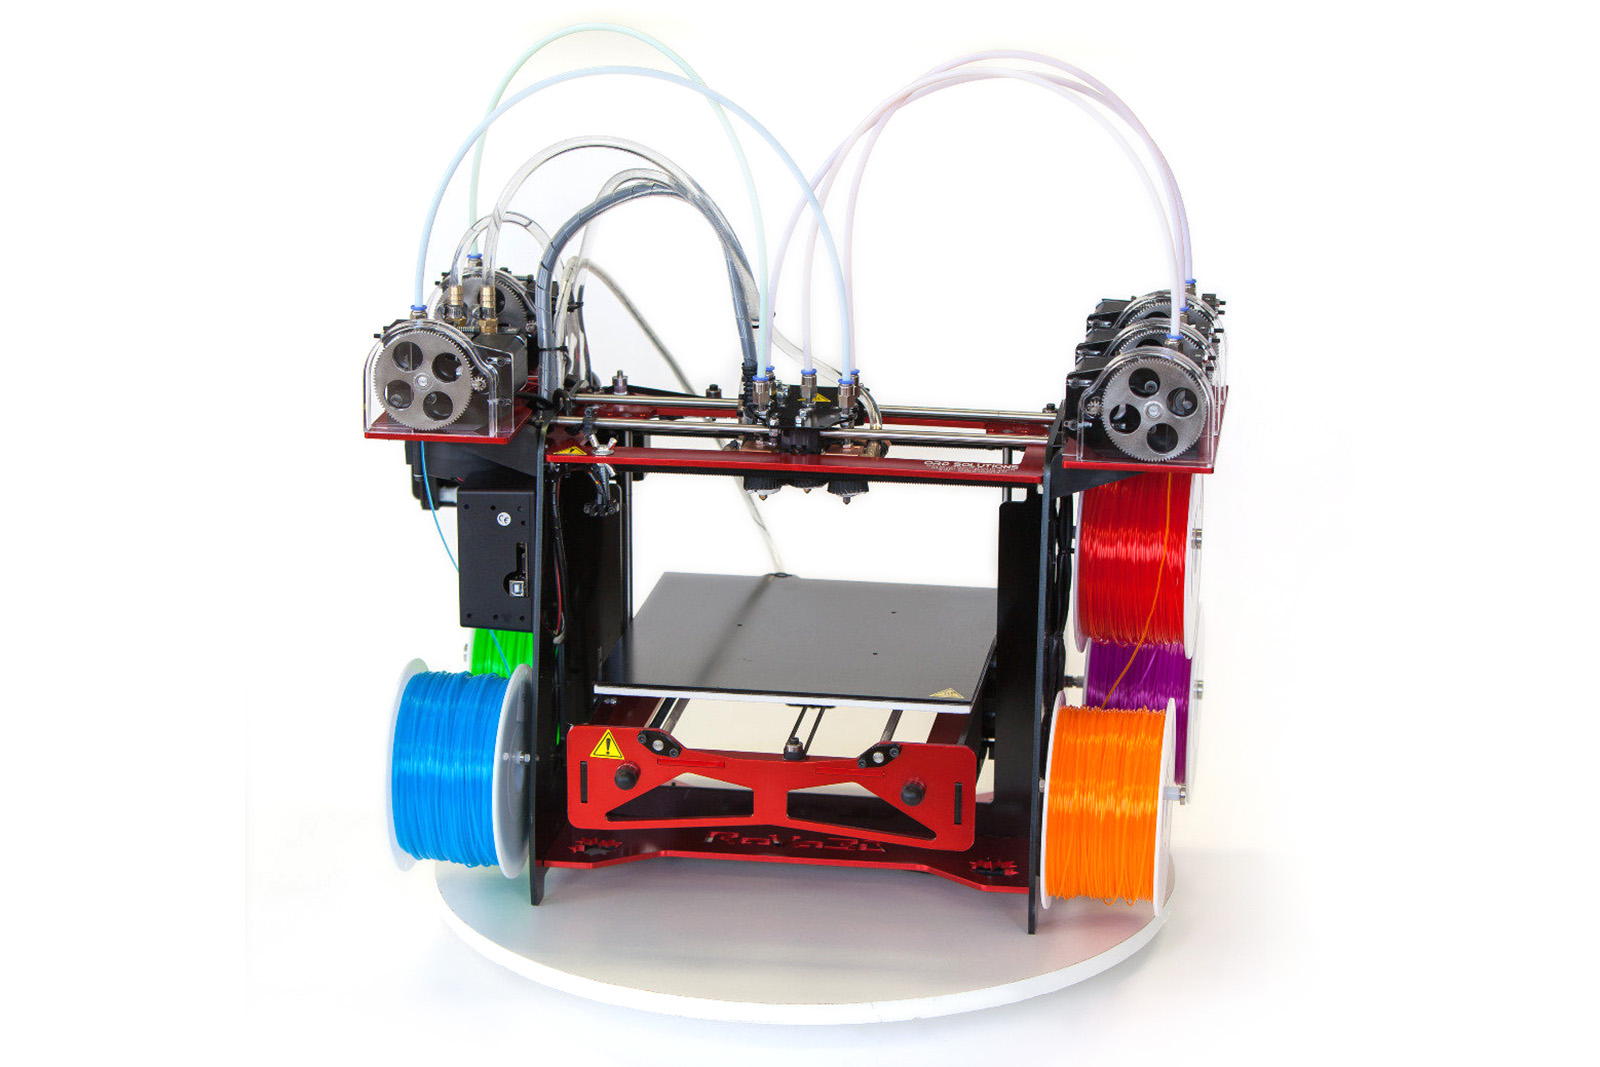
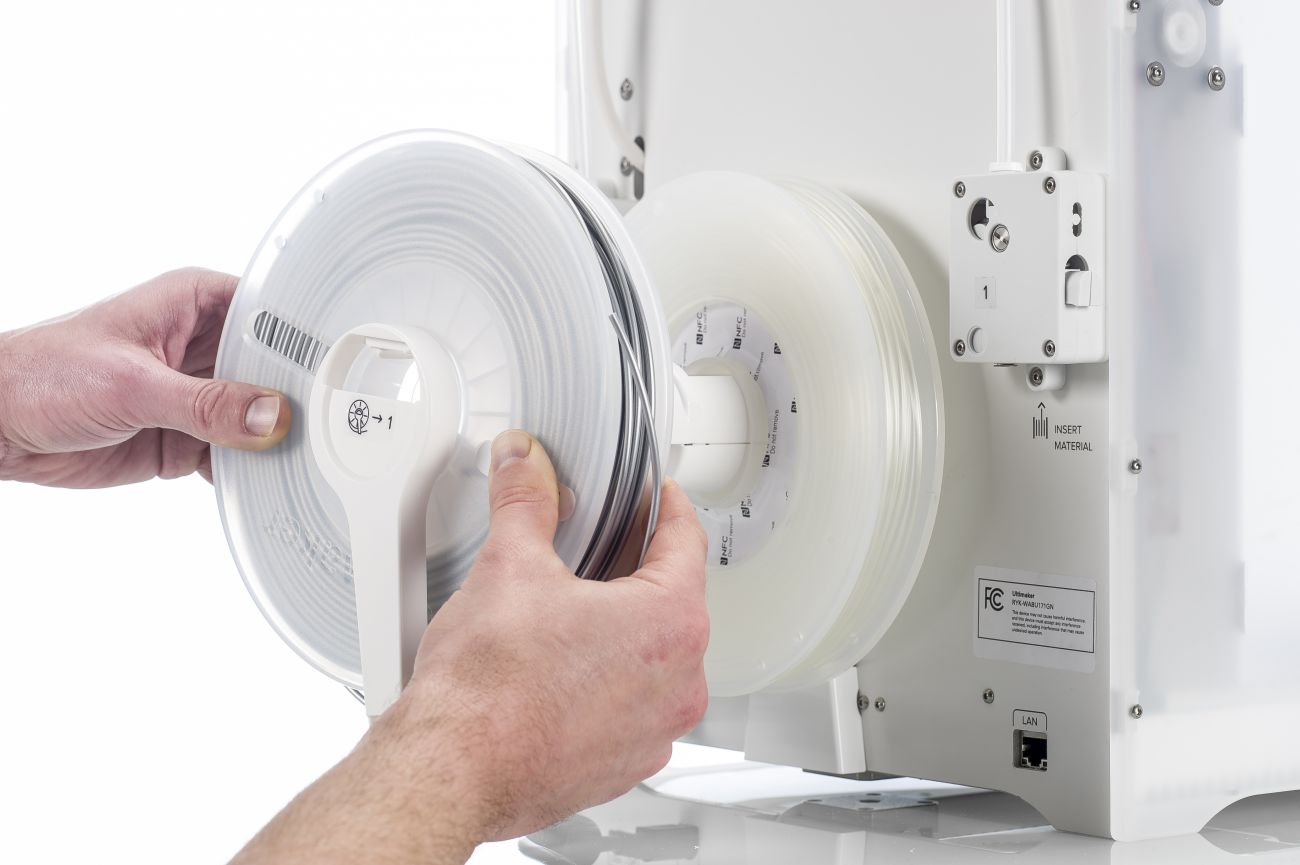 If you own a bare-bones S5 then you are familiar with the inelegant method of loading two spools on the back which, assuming the printer is not on a table in the middle of the room, requires the large printer to be spun around every time. It also involves some finicky plastic bits, manual manipulation of the feeders, and (for me at least) a fair bit of profanity.
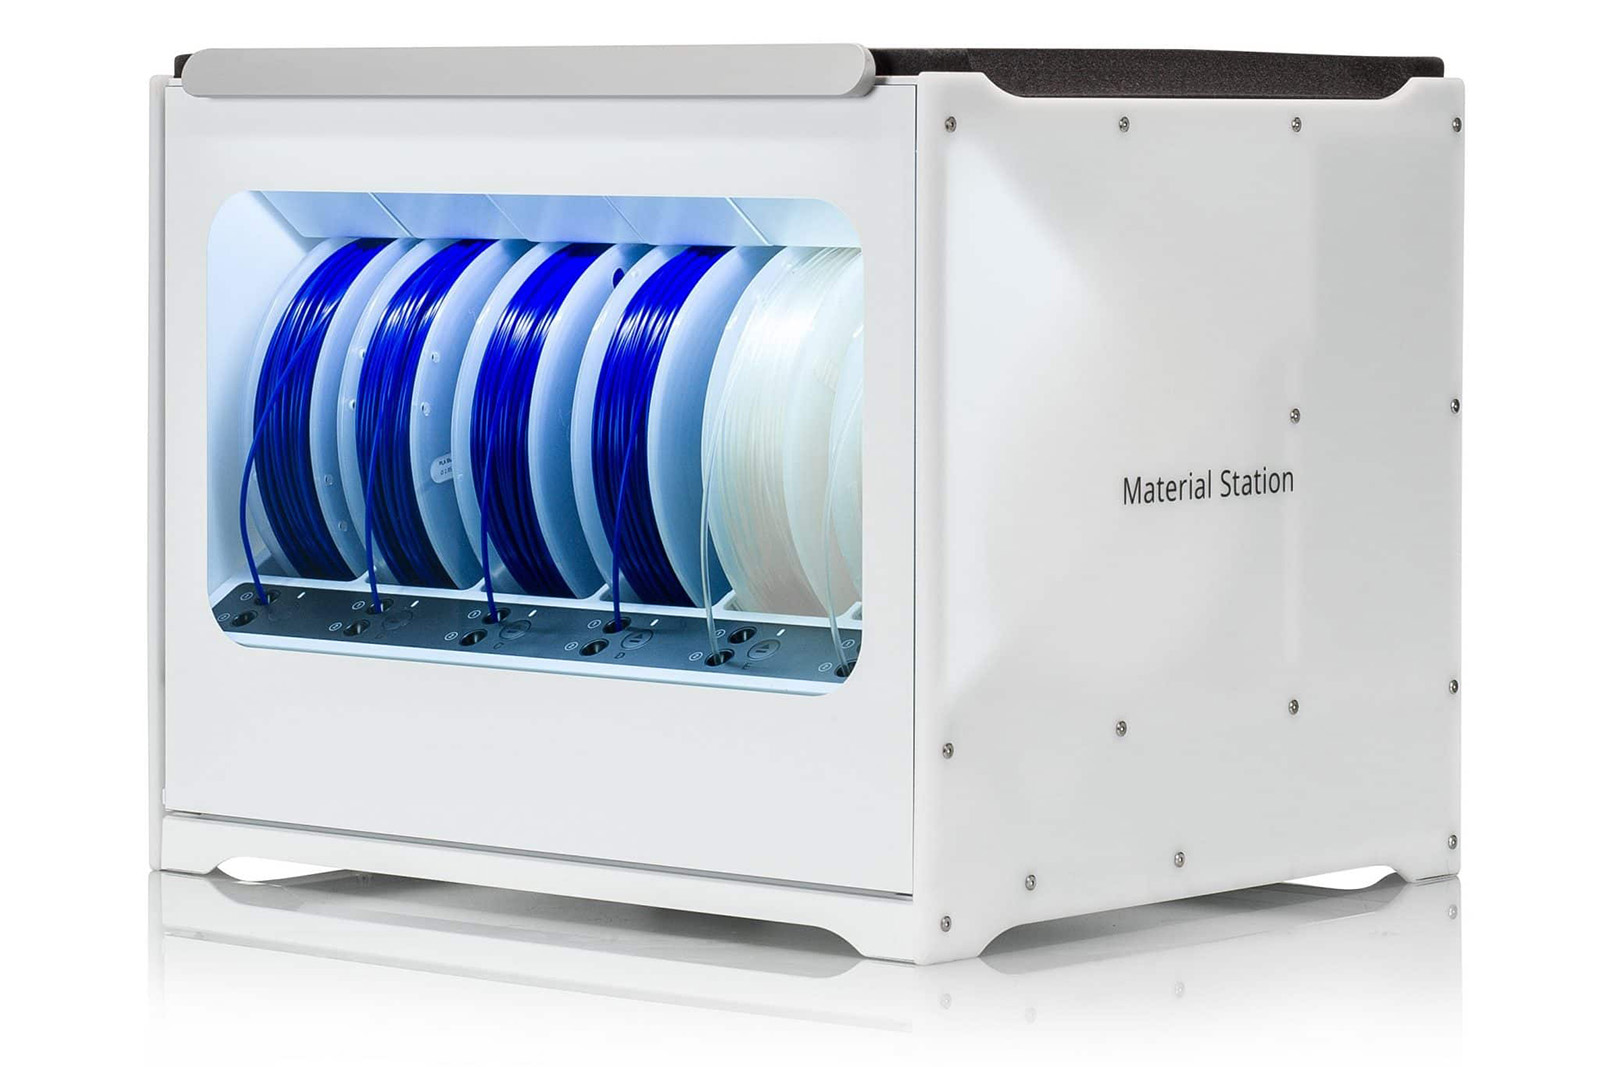
The Ultimaker Material Station is an expensive add-on (sort of — more on that in a minute) to the Ultimaker S5 3D printer that solves all of these complaints and more.
When I was deciding if I would fork over the hefty sum of cash for this unit, I was surprised by the lack of useful information out there. I posted a question on Reddit about it and after mulling over what I read there I decided to buy it. Having used the hell out of it for just over two months, I decided to write up what I’ve learned.
Let me say up front that I freaking love this thing. It’s made just about every aspect of printing with the S5 easier, and compared with needing to spin the printer around to change spools, it is an absolute joy to use. It’s not all sunshine and rainbows, though, so let me first talk about the good and then I’ll cover the not-so-good.
The Good
Let’s cover some of my favorite good points about the Material Station.
It’s not Really an Add-On
 When I previously installed the Air Manager for the S5, it showed up in the front panel menu system as a peripheral that can be turned on and off. The Material Station does not show up as a peripheral, and the filament management screen simply changed to the more complex system required for its use. In fact, the entire system seems to work more smoothly, though that may just be my relief at not having to spin the damn thing around and manually load each spool.
The reason I say that the Material Station isn’t an add-on is because it seems plain to me that the S5 was designed from the ground up to use it. By comparison, the default means of hanging two spools off of a hub on the back seems downright archaic by comparison. Before the Material Station I had problems with spools unraveling, and dealing with the manual insertion of the filament into the feeders had been problematic on more than one occasion. All of those problems just go away with the Material Station.
My guess is that someone designed the entire system and then was told (or was smart enough) to separate it out into parts so that the price of entry could be lower.
Changing filament is a joy
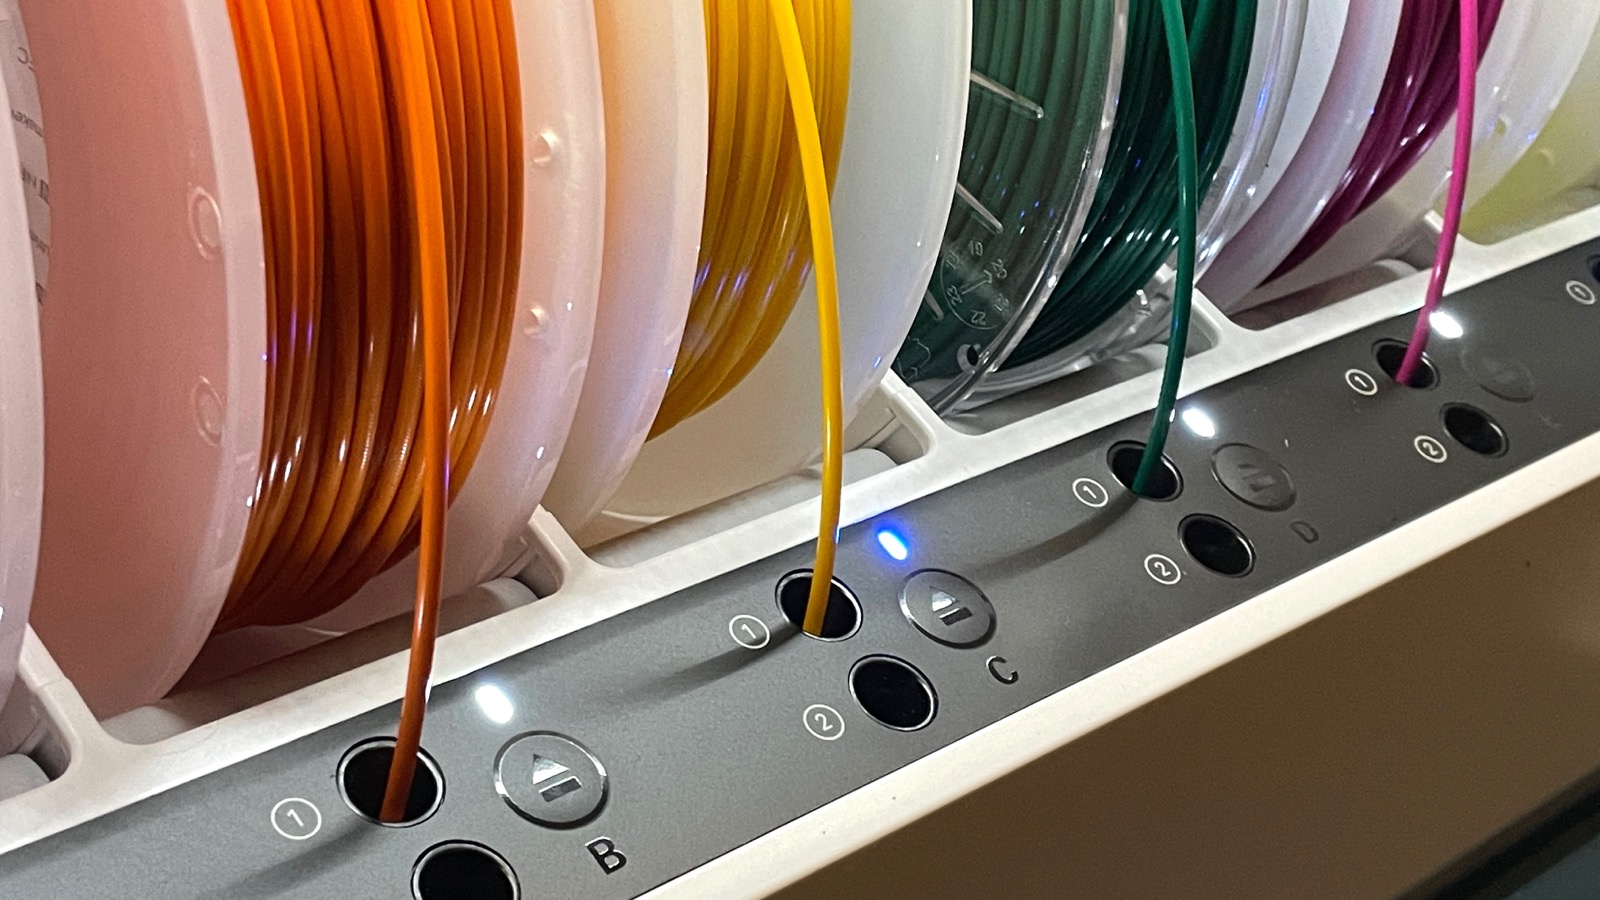
 No more spinning the printer around to change spools! Hooray! Everything is now done right from the front of the machine, including deciding which Print Core the spool is assigned to. When you place the spool all you do is put the end of the filament into either the (1) or (2) hole for that slot, and the Material Station takes care of the rest. After a year of spinning the printer around and dealing with the not-so-great design of the two spools system back there, this system is SO much better!
 Once you’ve done that, the front panel will show you whats in each slot, and will show you where each slot is going.
In this example I have slot F loaded with PVA and routed to print core (2), but slot B has generic PLA that’s also going to Print Core (2). They don’t both use the installed AA 0.4 print core, so if you choose to print with PVA the printer will prompt you to change Print Core (2) to a BB, though you’ll have had to override the existing settings in Cura to get there since Cura reflects what’s in the printer.
Oh – and perhaps the best part of all of this is that you can add, remove, or change any spool that isn’t being currently used while the printer is printing! Doing a long print and the filament in use is running low? Simply add another spool of that material into another slot for the same Print Core and the printer will automatically fail over to it when the first spool is empty.
Climate Control is a Joy
The Material Station works to keep the humidity inside itself to below 40%. It does this by having a chamber filled with silica beads, and when it senses the humidity getting too high it heats them to regenerate them. Note that this won’t dry out PVA that’s already absorbed humidity, but you can always set the build plate to 50°C and let the spool sit in its box on the build plate for a few hours as per Ultimaker’s own recommendations. I think the two hours mentioned there is not long enough, but the S5 does have an enclosed build volume with the Air Manager attached, so maybe it is.
The Build Quality is Fantastic
 Since the Material Station is closed up for humidity control, the front door stays shut with magnets. Since the door is glass it’s also pretty heavy, so when you open it the chance for it slipping from your hand exists, which leads to one of my favorite undocumented features: The door’s action is damped. It’s kind of like soft-close kitchen drawers where if you let go of the door by mistake, it won’t slam and possibly break. Instead it slowly lowers itself down with grace and aplomb.
The S5 Works Better with the Material Station
When I first got the S5 I had all sorts of problems with the run-out sensors triggering false positives so I ended up turning them off. With the Material Station, I turned them back on and after over 300 hours of printing have not had a single false positive. I believe this is due to the fact that the Material Station has multiple sensors in it so the entire system has a better understanding of the filament at every stage of its travels. In fact, when I had PVA break in the bowden tube (more on that in a bit) the additional sensors actually allowed the machine to tell me where the problem was. It’s not always 100% accurate, but it’s a super useful addition.
Cura Show Every Permutation of Available Print Options
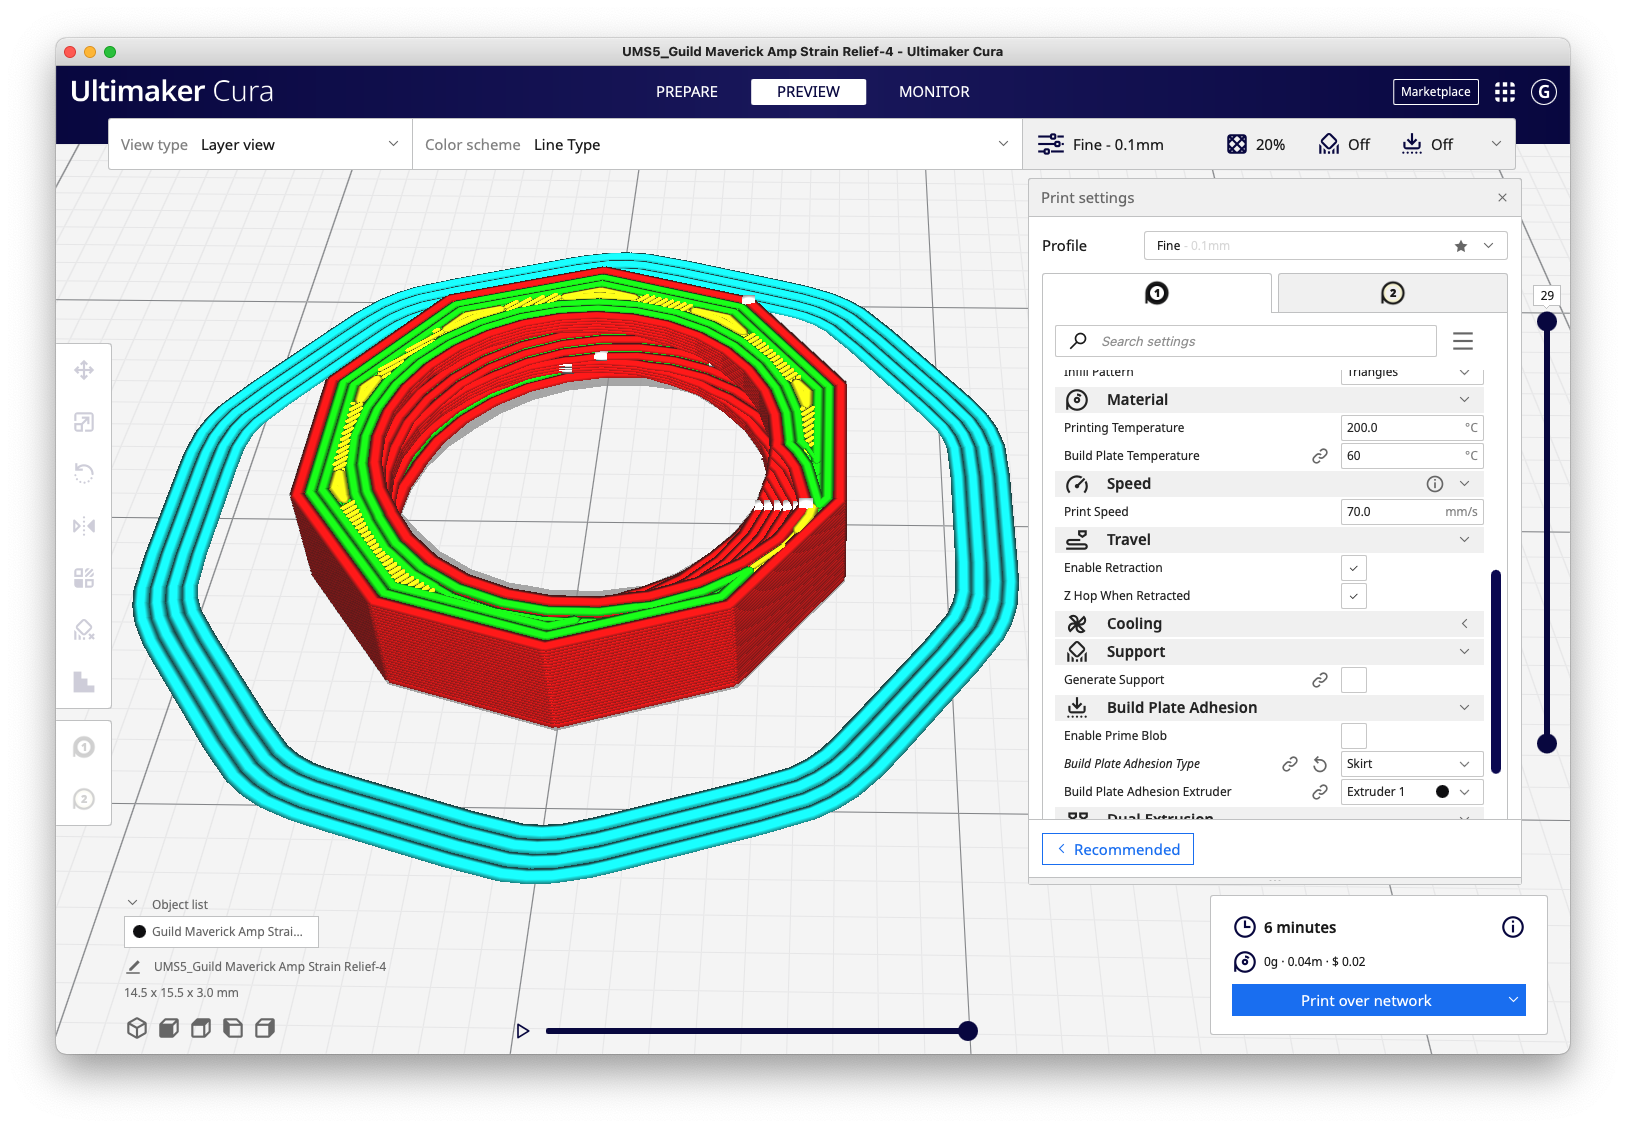
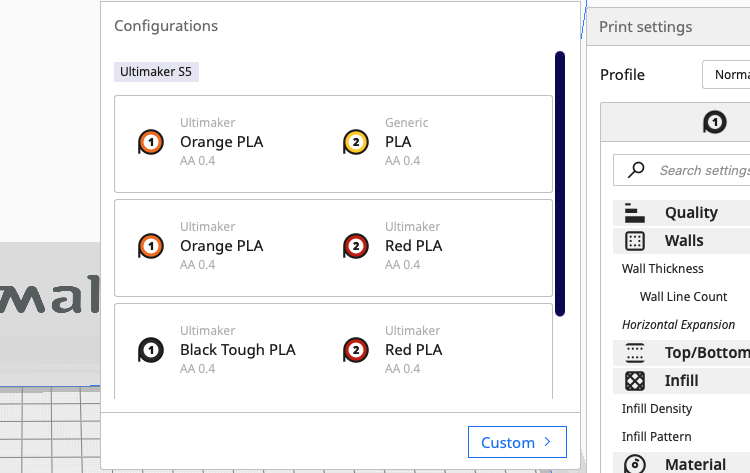 I thought this was pretty well done. In this screenshot of Cura, the Material Station was loaded with the following spools in the following order along with their selected Print Core:
- A: Ultimaker Black Tough PLA (1)
- B: Ultimaker Black Tough PLA (1)
- C: Ultimaker Red PLA (2)
- D: Ultimaker Orange PLA (1)
- E: Generic Yellow PLA (2)
- F: Ultimaker PVA (2)
Cura then took every possible permutation and listed them as pairs that could be chosen, which I found to be very user friendly. There are more combinations available via the scrollbar on the side.
The Not-So-Good
While I do love the Material Station, here are some of my thoughts on things I’m not too fond of in regards to the Material Station.
It’s Ridiculously Expensive
 The price for the Material Station has been $3,300 everywhere for the year I’ve been watching, and it has never once gone on sale. The only way I’ve seen to get it cheaper is to buy it as a bundle with the Air Manager, but when I bought my Air Manager I didn’t want to spend the money for both so I ended up paying full price for all three components. If I’d been able to buy the entire Pro Bundle at once, I could have saved almost $1,000 but then I would have had to have spent $10,000 all at once and that wasn’t in the cards at the time.
Is it worth the price? If you consider the S5 to be worth the $6000 price, then yeah, I’d say the Material Station is worth $3,300. Whether you consider those prices to be valid or an “Ultimaker Tax” is up to you, but having owned a pretty expensive BCN3D SigMax that I considered to be junk, I do think this printer is better. It’s also not cheap import junk, so don’t compare it with anything made by the likes of Creality and expect it to have a similar price. Yes, I know a machine like this can’t escape Chinese components, but there’s this is not a $300 machine with a $10k price tag.
It Wastes a lot of Filament
Because of the nature of 3D printing and the desired autonomy and automation of the S5, the addition of the Material Station causes a lot of filament waste. Here are the two biggest offenders that I’ve noticed.
1) Purging Before and After Every Use
 This one bugs me a lot, but the reasons it seems so wasteful are complicated.
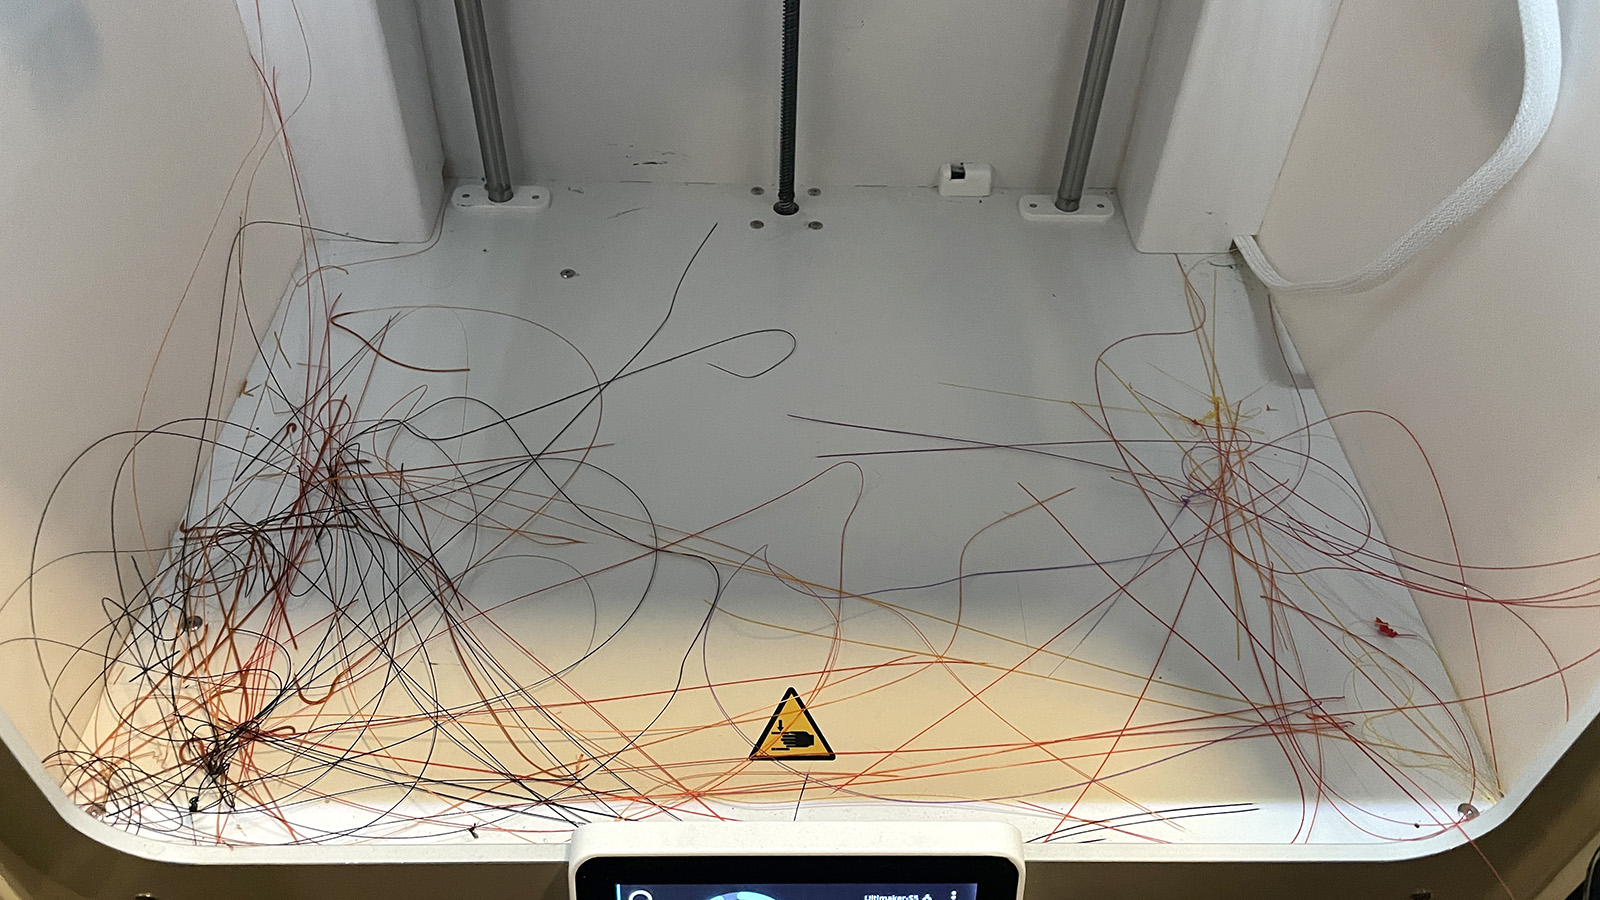
According to this article from Ultimaker, the S5 with the Material Station will prime and deprime at the start and end of each print as well as when an end of a spool condition is detected. The result of these primes and deprimes is a pile of ugly filament strings in the bottom of the printer, the likes of which I’d never seen when swapping spools manually.
 The reason for the depriming is so that the filament ends have nicely shaped tips, which greatly aids in the function of moving the filament through the system, which as we’ll see later on, is pretty complex.
The engineering part of my brain accepts this as likely the result of many experiments that resulted in procedures used to guarantee the highest rate of print and function success. I’d imagine that the alternative would be a great deal of manual control which is counter to the reason for getting the Material Station in the first place.
The bottom line is that this is just part of having a Material Station, so understand that you’ll need to clean out the bottom of the printer more often than you’re used to if you’ve been printing with a bare-bones S5.
2) Empty Spools are not Truly Empty
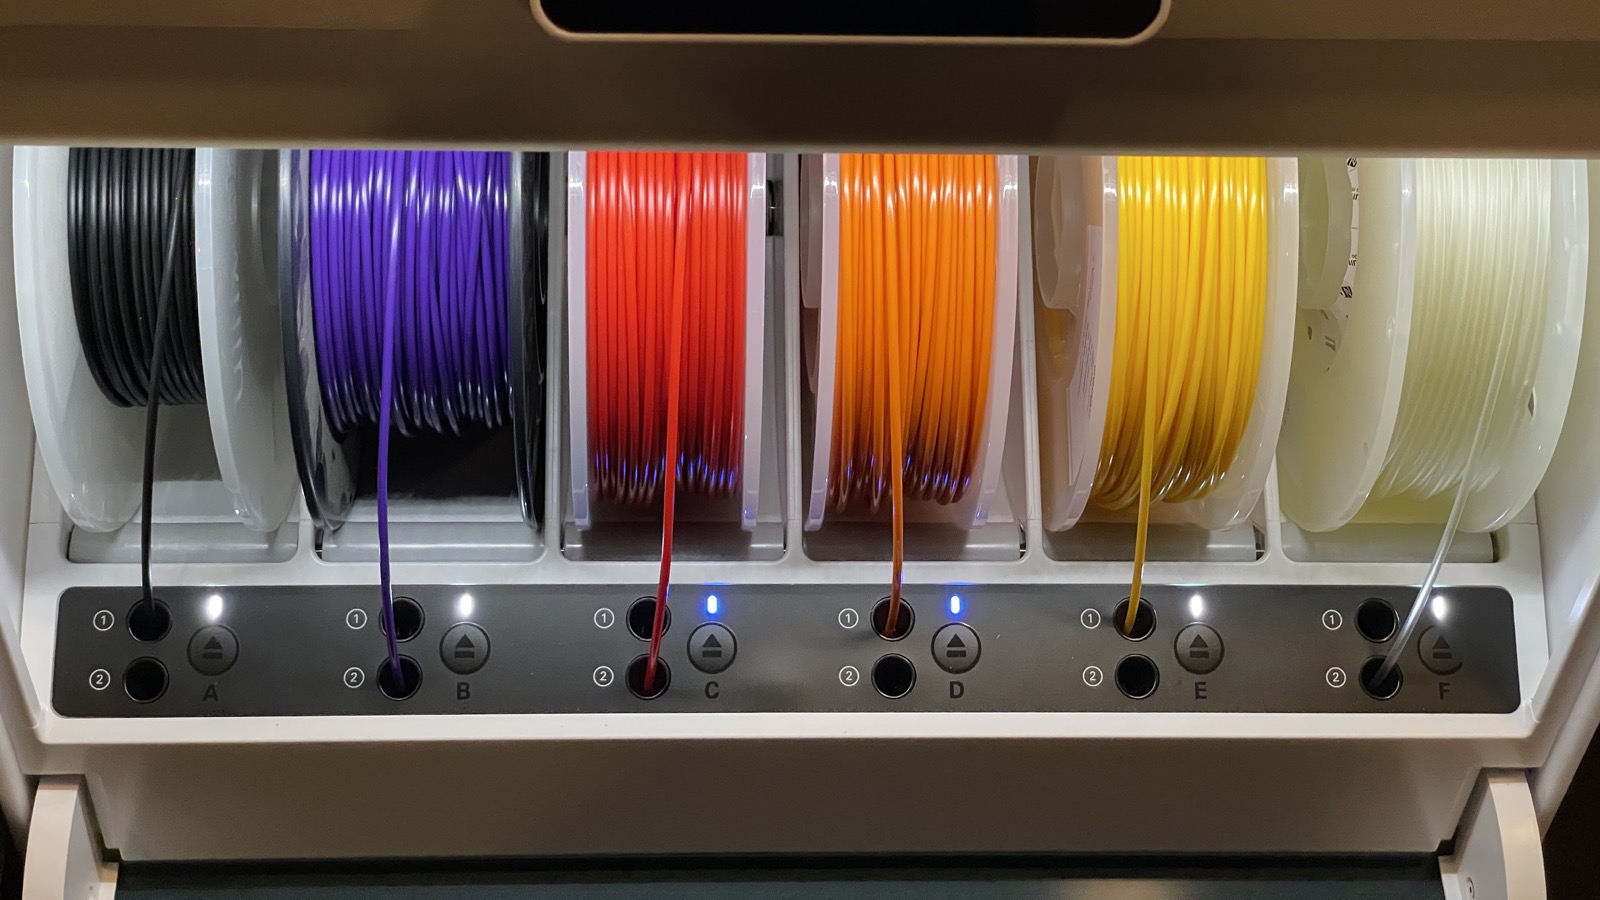
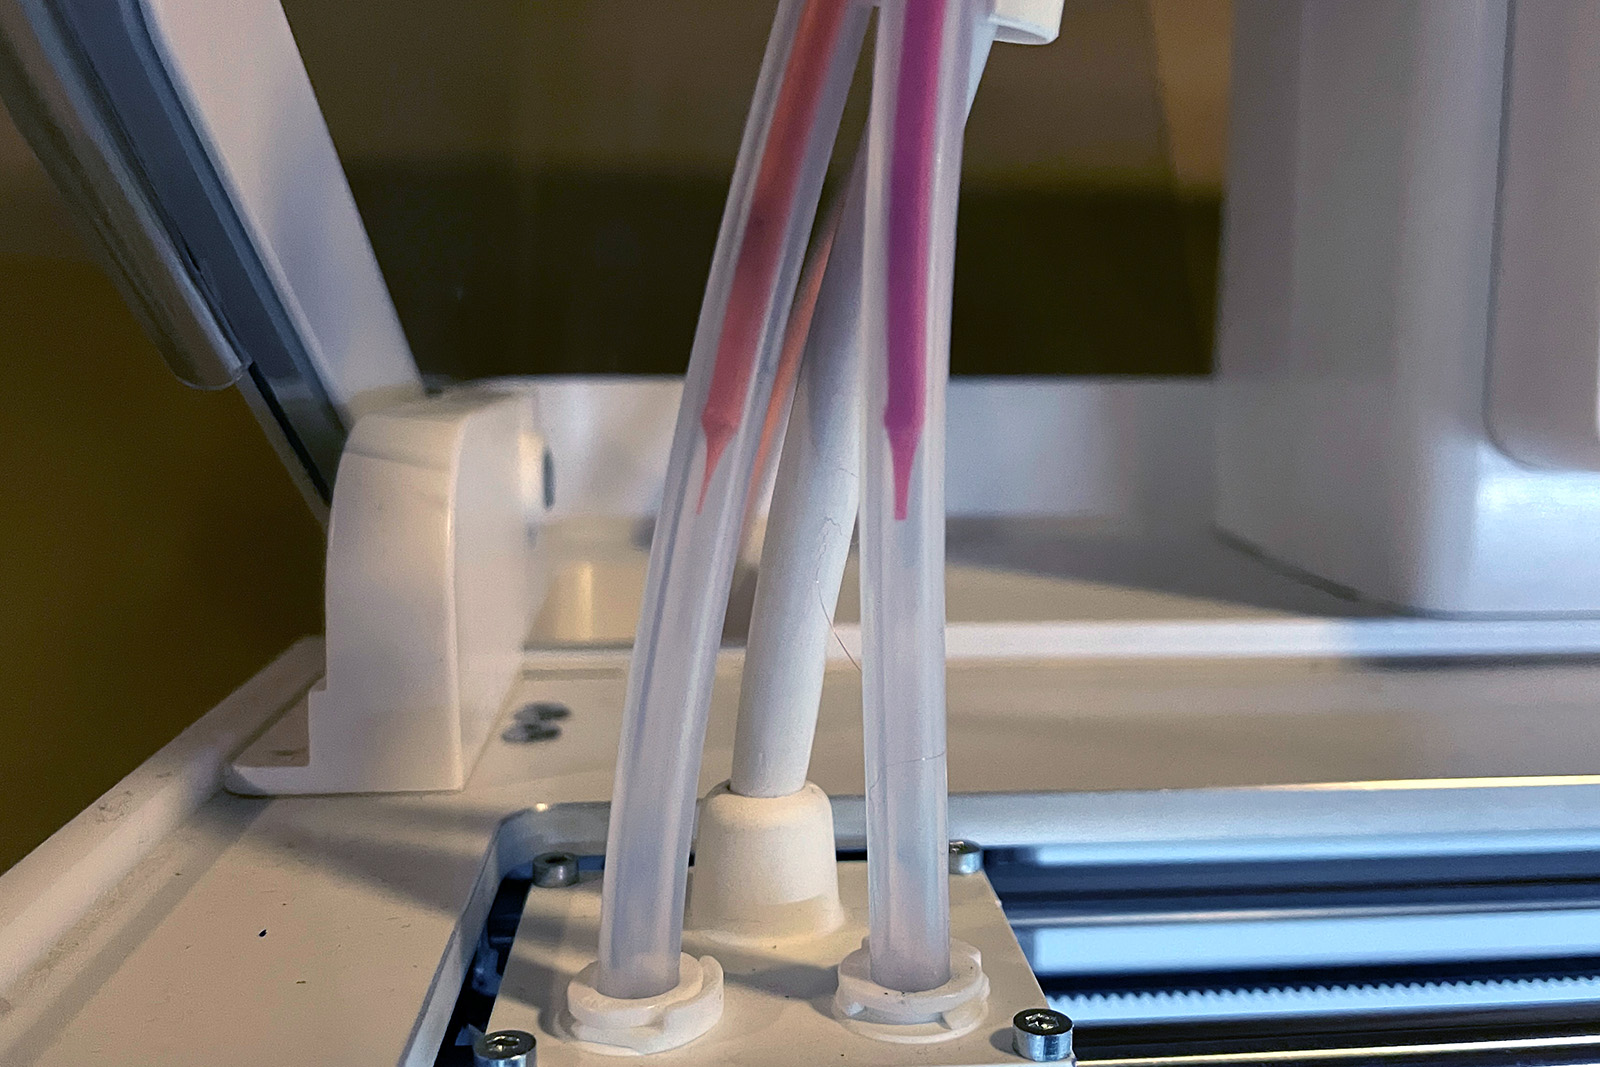
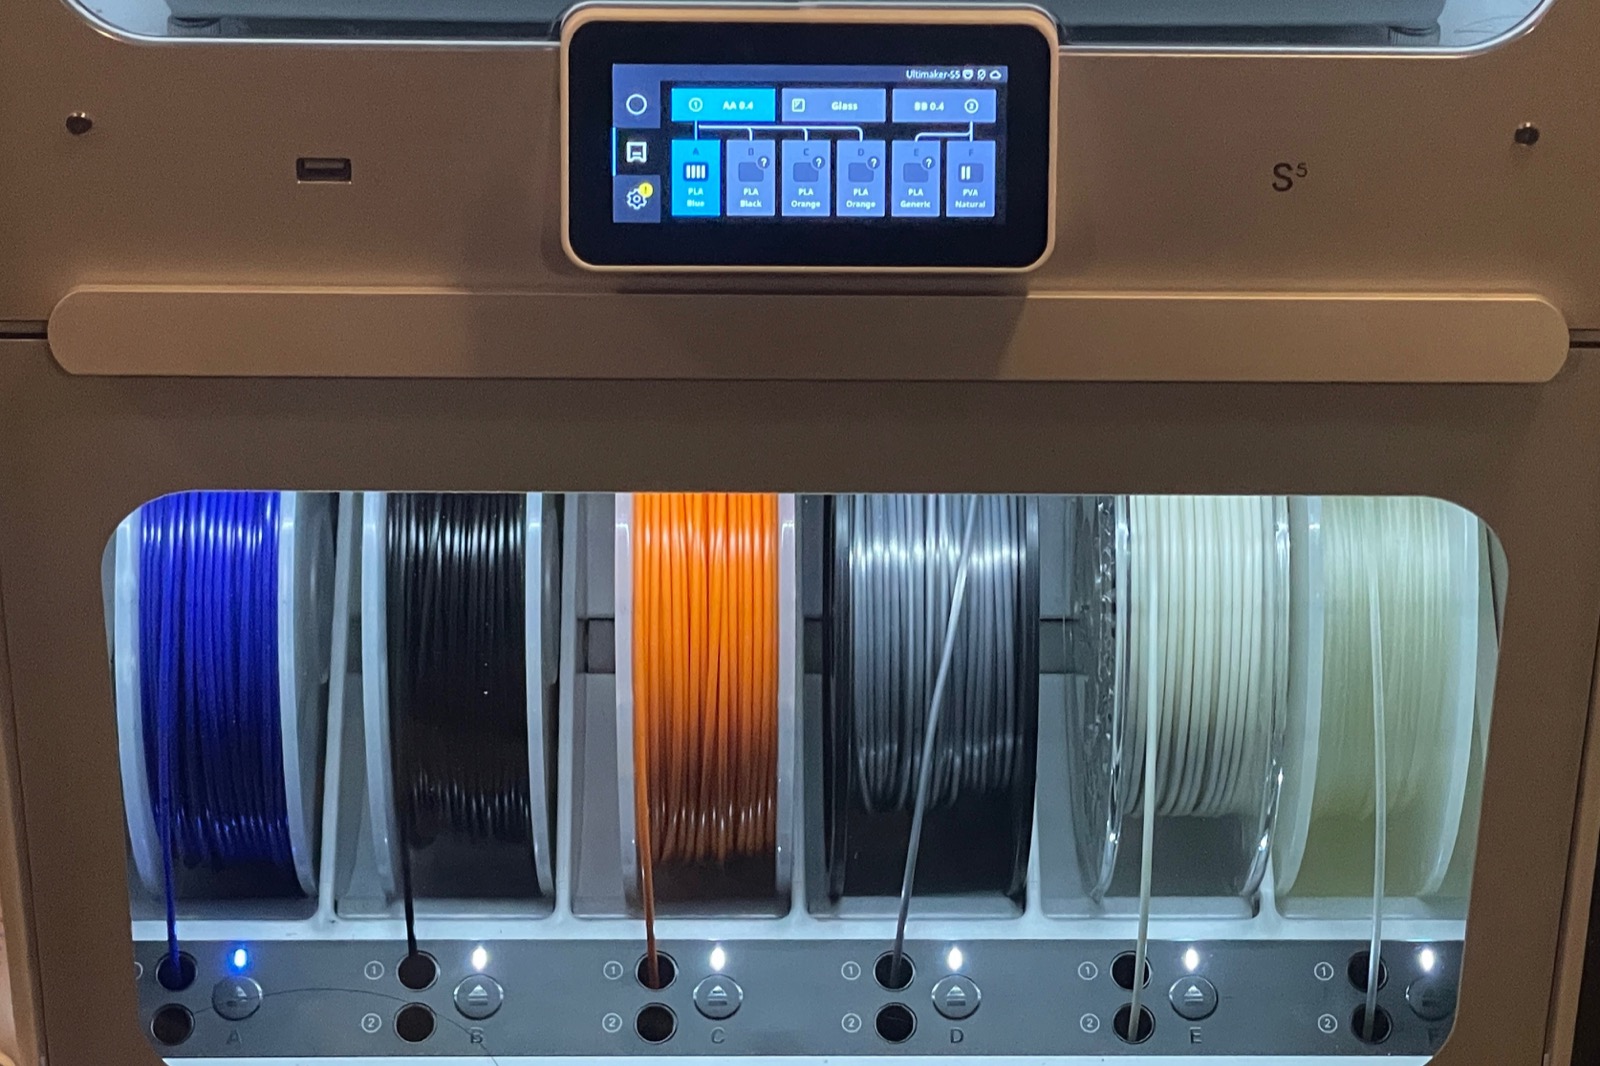
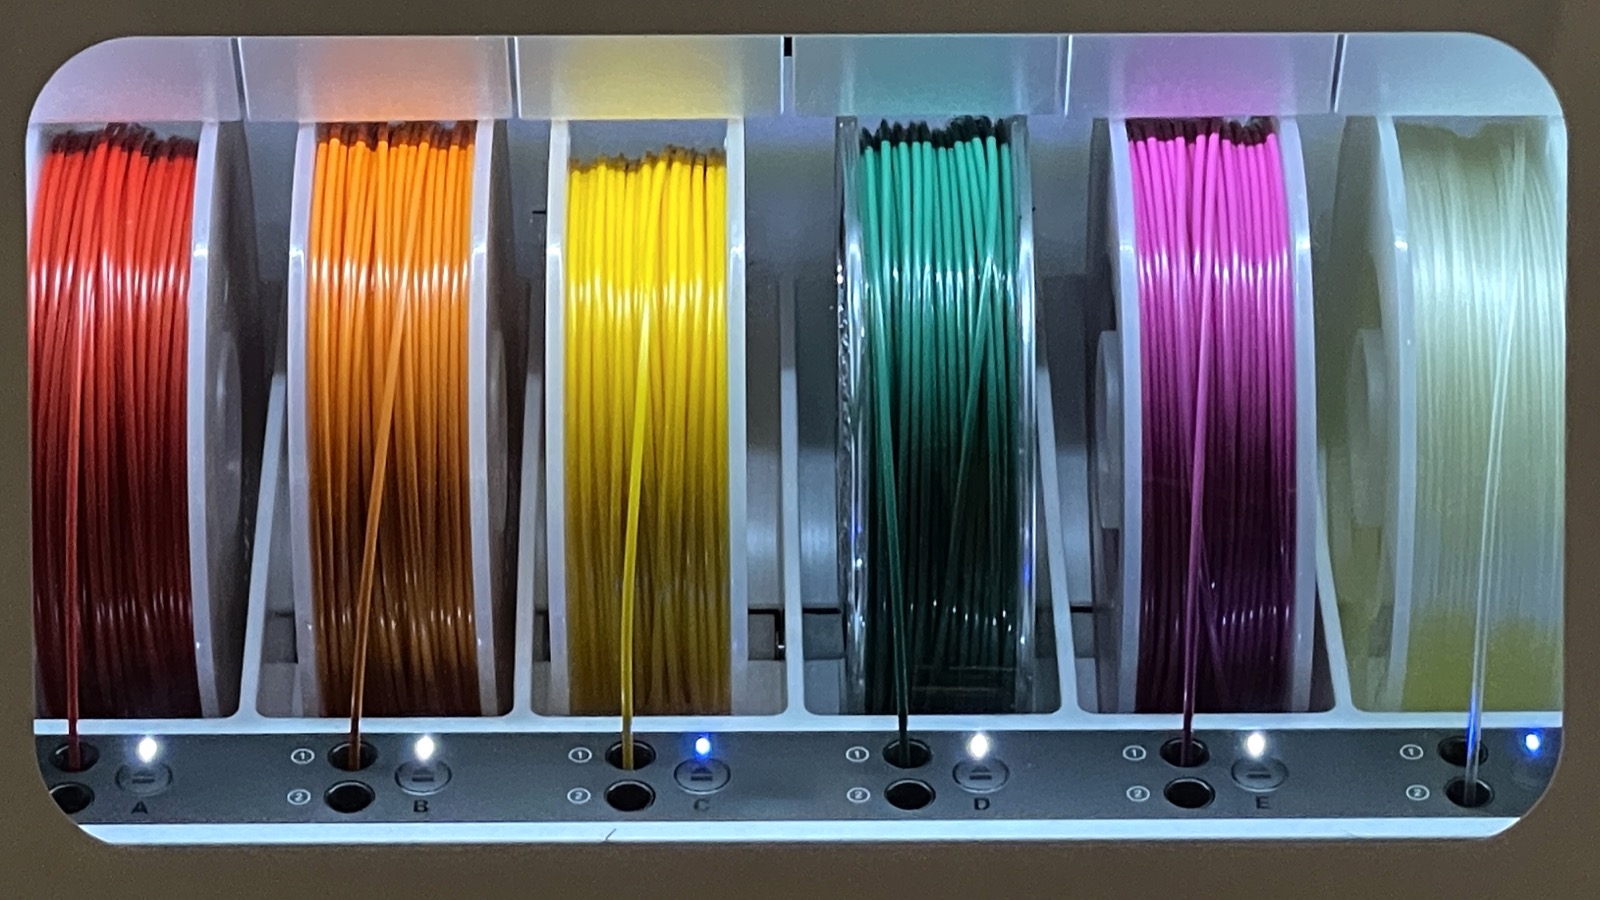
![]() This picture sums up my point on this one. See the spool on the far left in position A? That’s a spool of Ultimaker Tough-PLA in black, and if you look at the display in the top of the image you can see a yellow (!) over the position, and that (!) is an alert that the spool is empty.
This picture sums up my point on this one. See the spool on the far left in position A? That’s a spool of Ultimaker Tough-PLA in black, and if you look at the display in the top of the image you can see a yellow (!) over the position, and that (!) is an alert that the spool is empty.
Now, it’s really cool that the empty spool was detected and then replaced by the spool of Ultimaker Tough-PLA in position B, but that’s not an inconsequential amount of filament left on that roll. How much is on there? About six feet (1.8m). According to the data sheet, a spool of Tough-PLA in black has 96m of filament, so rounding up to 2m for easy math, we get 1/48th which means almost 2% of it was left on the roll. That’s… not great.
It Slows Down Prints
 Due to the fact that it primes and deprimes before and after every print, and for additional reasons I can’t discern, there is additional wait time at the start and end of every print. If you’re using this in a production environment (and especially in a farm) it’s no big deal because you won’t really care about the printer until it signals that the print is done, but if you’re using it at home and watching it print, you’ll be quickly frustrated as you watch the printer seemingly do nothing for 5+ minutes at the end of a print after which it will signal that it’s done.
How much time does it add? I printed this small nut I designed which, as you can see in the Cura screenshot, should take six minutes. Inclusive of prime, bed-leveling, startup, printing, deprime, and (I assume) cool-down, the print took 16 minutes. Prints using both extruders take even more time since each side must be primed and deprimed.
Broken PVA can be the the Stuff of Nightmares
 This has not happened to me, thankfully, but having PVA break inside the Material Station can be an aggravating problem. Since I started writing this I’ve had PVA break in the bowden tube on the back of the printer. That can be annoying, but the solution is to spin the printer around and clean out the Bowden tubes which is nothing like what I’m about to describe. Note also that my printer was made before Ultimaker upgraded the feeders due to PVA breaking issues, and when I sent them my serial numbers they sent me newer replacement feeders for free.
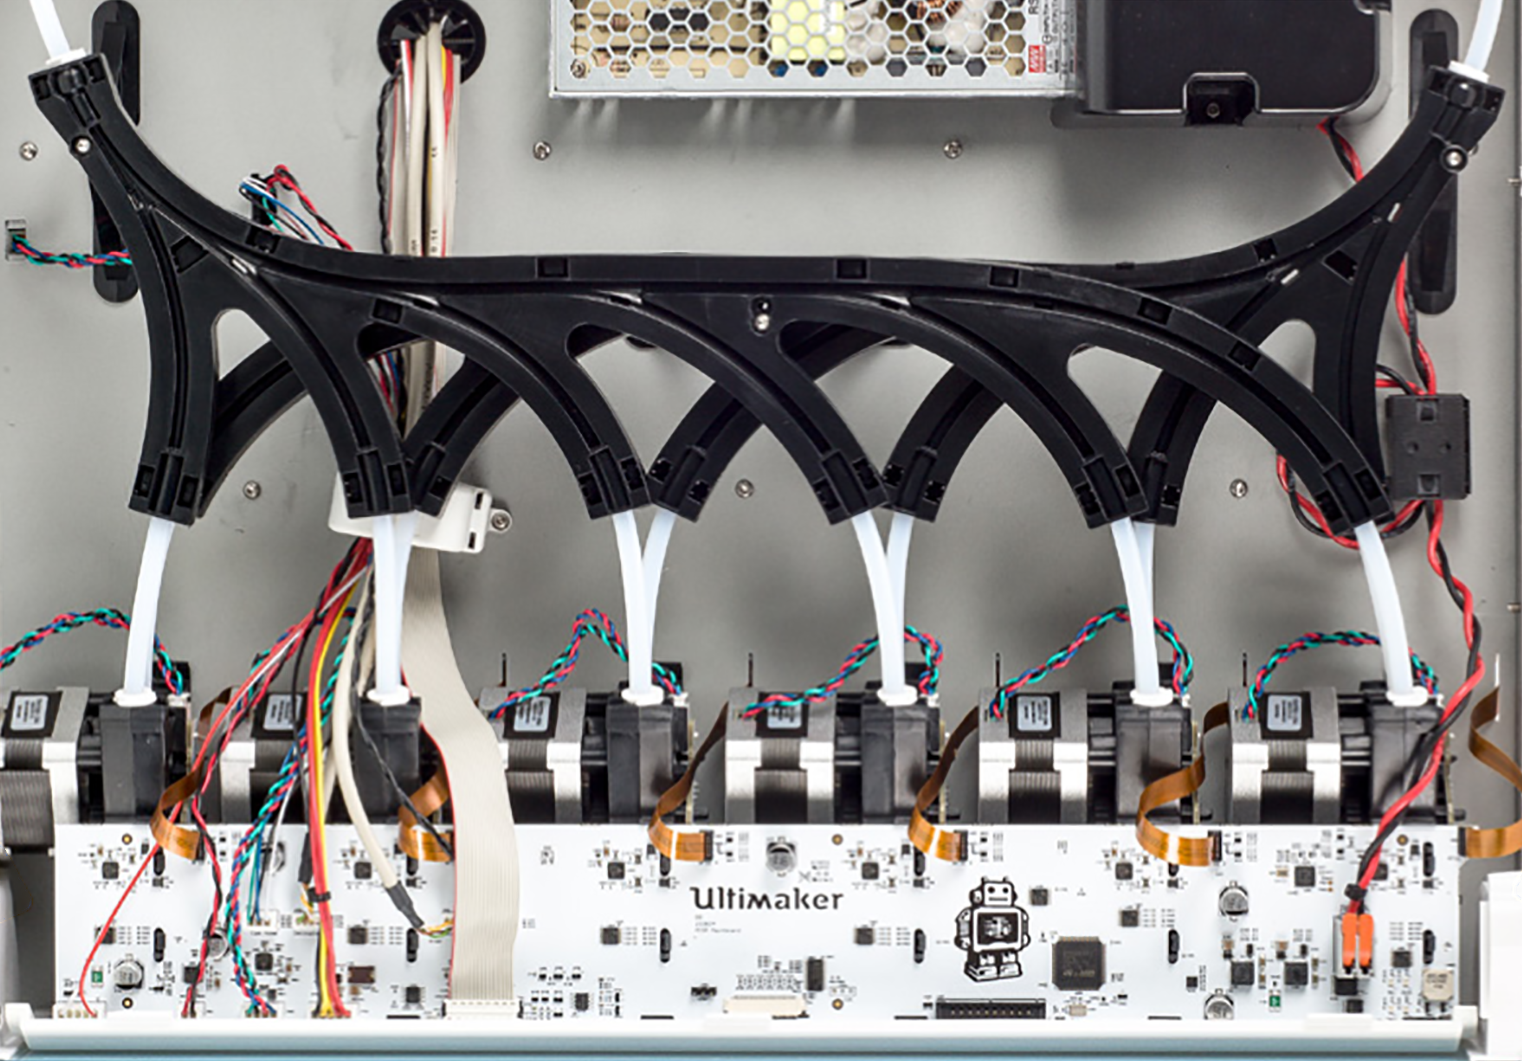
This page from Ultimaker makes it seem like an almost trivial task to get a piece of broken PVA out from the machine, but that guide only applies to PVA broken outside the Material Station. It doesn’t really tell the whole story because sometimes PVA can break and get stuck inside the mergers (the black curved pieces in the photo) within the Material Station, and when that happens you may have to remove the Material Station from the printer, flip it over, take the bottom off, and disassemble the unit to resolve the issue. This page from the Ultimaker Community (an awesome resource) shows one user’s process of getting a piece of broken PVA out from within the bowels of the Material Station. The image of the Material Station guts in this section is from the official Ultimaker Material Station Repair Guide, and let me tell you: it’s not a simple user-friendly process.
I have no problem building, disassembling, and otherwise tinkering or troubleshooting even the most complex of systems, but all of that is on the bottom of the Material Station which sits on the bottom of the S5. It’s a pain in the ass just to get to it!
What’s the moral of the story? Keep your PVA dry, and if it’s not dry, then dry it out before you put it in the Material Station! Every person I’ve talked to who’s had to do this said that their PVA had been exposed to too much moisture when it happened.
The System is Clearly Designed for Ultimaker Spools
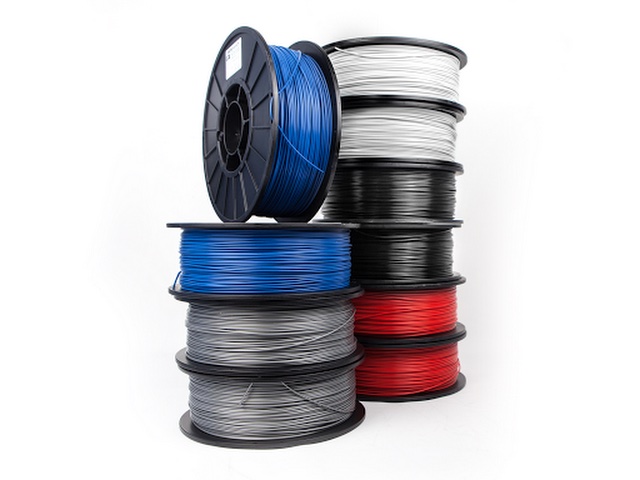
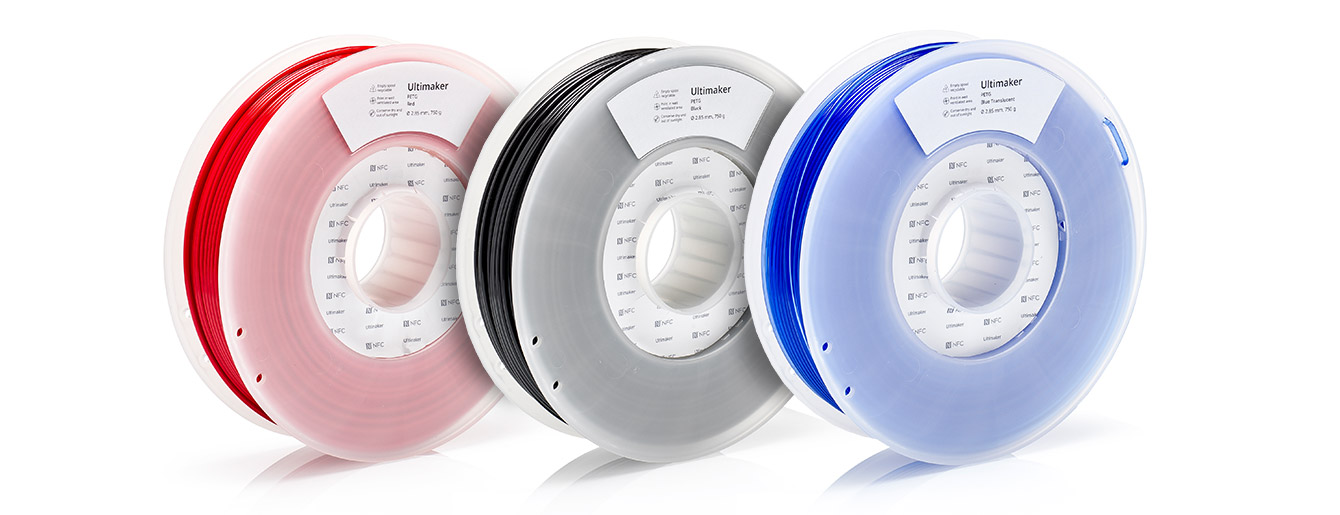 I love the Ultimaker spools of filament, but they’re too damn small (only .75kg), and too damn expensive (the same price as 1kg generic). The system works really smoothly with Ultimaker spools, though, to the point that it’s almost worth using them exclusively especially because the system isn’t hampered by the spools running out. You can absolutely use Generic spools up to 1kg, though, which brings me to my next point.
You can use Generic Spools! But use is Limited
 I use MatterHackers 1kg spools of PRO Series PLA and they fit and work great. However…
You cannot have different colors of the same generic material and have the printer understand that. For example if you load two rolls of MatterHackers PLA-Pro: one purple and one red, the printer only knows them each as “Generic PLA”. That has some important drawbacks including:
If they’re both set to the same Print Core, and purple runs out then it will continue with red and vice-versa. Additionally, the printer, and thus Cura, will only see each spool as the material you’ve selected and will have no concept of what color each spool is, so you’ll need to just keep that straight yourself. If you have multiple of the same generic material loaded into a Print Core, the printer will choose the one you loaded first regardless of color.
You can print two-color objects using generic filaments with the Material Station, but to do so the simplest way is to load *only* those two generic colors, and have each of those colors loaded into the proper Print Core. If the rest of the loaded spools are Ultimaker then the printer will handle this perfectly since they are not “generic”.
 Update: Thanks to a comment left by Theo (see below), I now know of a workaround for this! Basically when setting the filament type for the generic spool, instead of choosing “PLA”, scroll all the way to the bottom, choose Select Other Material, then choose Ultimaker PLA and then choose the color. Here is a picture where I’ve set up the grey spool of generic PLA in slot D to be configured as Ultimaker Orange.
Note that in my example this will cause the printer to use the grey spool of the orange runs out, so I would think that a better solution would be to set up custom selections in Cura – especially if your filament has different print properties than the Ultimaker materials. Thanks for the tip, Theo!
Not All Generic Filaments are Supported
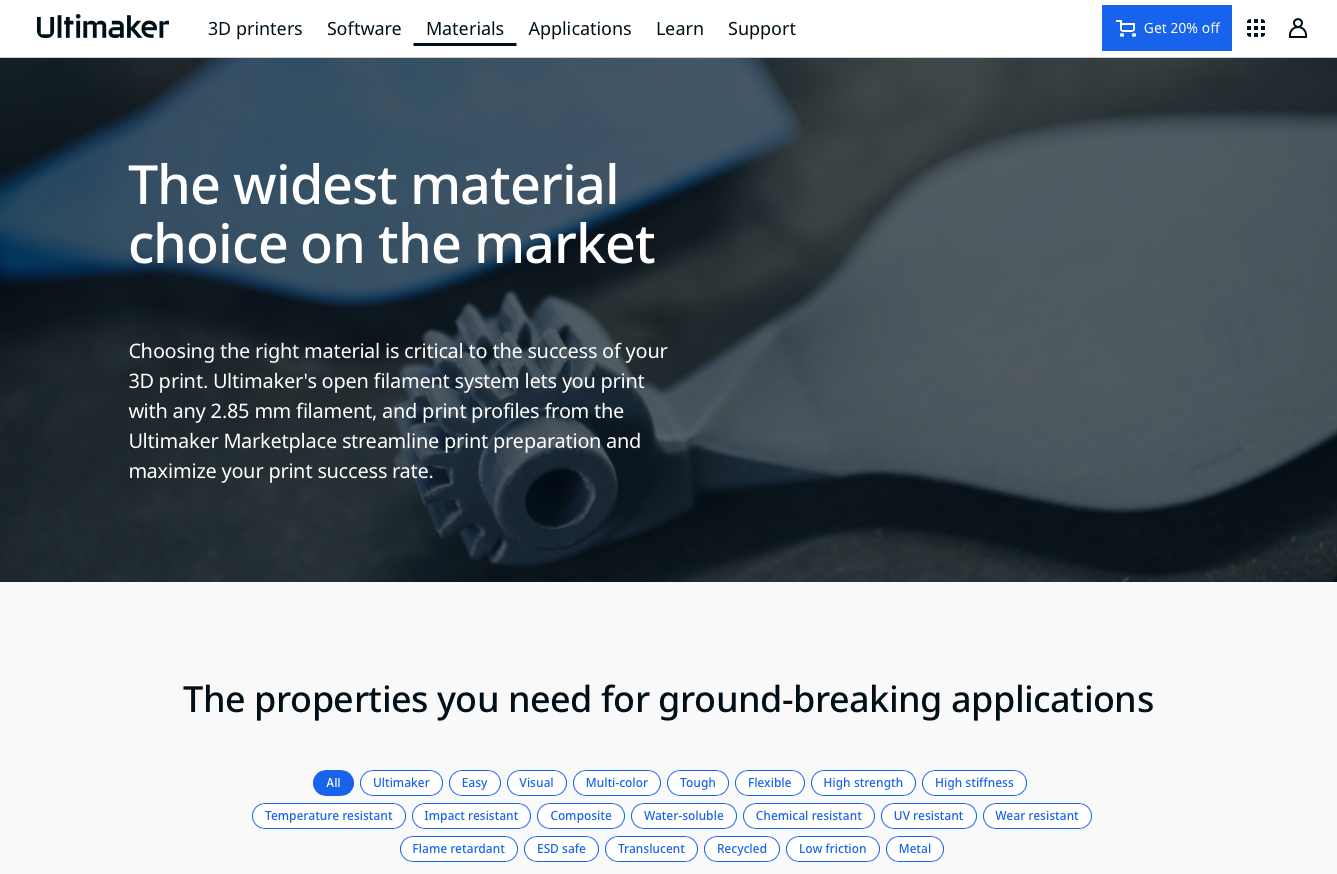 While the marketing material for the Ultimaker S5 states Ultimaker’s open filament system lets you print with any 2.85 mm filament…, that’s not entirely true when the Material Handler is added.
One of the things I’ve wanted to do was print with some Carbon Fiber filament, so I dutifully dropped an additional $3oo on a 0.60mm CC Print Core and went shopping for some Carbon Fiber. The one that seemed to check all the boxes for me was BASF Ultrafuse PAHT CF15. There’s even a plugin for it in the Ultimaker Marketplace! Nice!
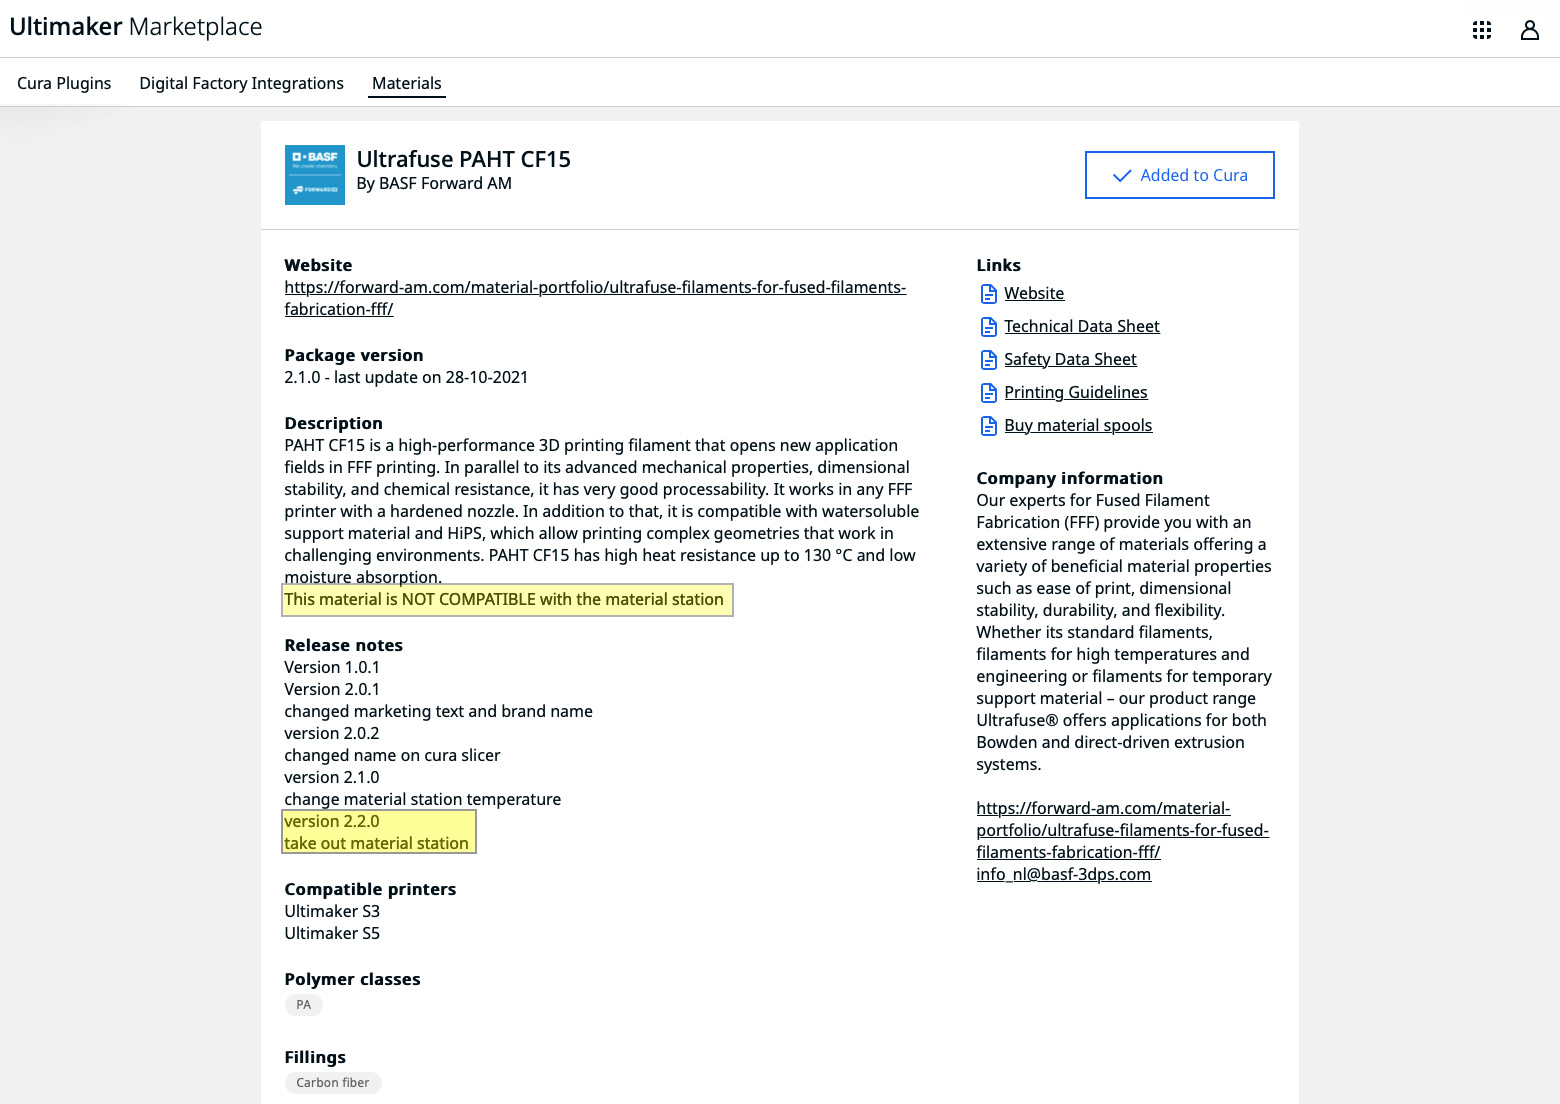 As I read up on the filament details I was shocked to discover that for some reason this filament is not compatible with the Ultimaker Material Station. Why? I’m not sure, but when I asked on the Ultimaker subreddit I got nowhere, so I asked on the Ultimaker forum where I got a couple of answers that seem to indicate that the material is too stiff to reliably function in the material handler, and though some have had success using it, Ultimaker suggests using it without the Material Station. Sadly, I see no way of bypassing the Material Station with it attached, which now that I think of it would be a pretty useful (and seems to me a relatively simple) addition to the device. In fact, that’s another negative for me.
There’s no Elegant way to Bypass the Material Station
It would be really useful to have a bypass setting where I could have an external roll (say, of BASF Ultrafuse PAHT CF15) that I could print with while totally bypassing the Material Station. Hell, Ultimaker could make even more money by selling me an external dry-box with an Ultimaker robot on it. I’m in this deep, so why not?
My point is that with the recommendation to not use the Material Station in the last section, but with no way to disable or bypass the Material Station short of turning it off, it seems like there should be a more elegant solution for using standalone external rolls of filament.
The Perhaps Not-So-Obvious
 You cannot print more than two colors or materials at a time. In other words the Material Station does not turn your S5 into a six-color printer like the Multi Material Upgrade (MMU2S) does for a Prusa printer or like this cool multi-color single extruder solution does from Gerrit Coetzeee vi Hackaday. The Ultimaker Material Station is an automation tool that’s designed for spool fail-over and programmable changes on a per-print basis. It cannot change colors mid-print. At least not programmatically.
I imagine such a thing is possible, but due to the need to prime and purge every color every change, not to mention the additional wear on the entire system since the spools are so far away from the hot-ends, I imagine this is not something Ultimaker considers a necessity on what is designed to be a automated industrial-scale machine.
Conclusion
 So there you have it. Even with the not-so-good aspects, I’m very glad I bought the Ultimaker Material Station for my S5. Yes, it’s stupidly expensive, but the ease of use and thus the efficiency of printing with the Ultimaker S5 goes through the roof with its addition.
I wish it allowed for configuration of color when using generic spools so that it could be as useful as it is with Ultimaker spools, and I wish it was less expensive, but even with those caveats I don’t consider the negatives I listed to be deal-breakers, so I still recommend it. You know, if you can afford it.
Donate: PayPal Crypto:
ETH: 0x0AC57f8e0A49dc06Ed4f7926d169342ec4FCd461
Doge: DFWpLqMr6QF67t4wRzvTtNd8UDwjGTQBGs
Regarding the problem with multiple colors of third party materials, can’t you just lie to the material station that you’ve inserted an Ultimaker material in the color of your choice? The plain S5 has the option (scrolling all the way down to “Select other material” then choose an Ultimaker one).
Whoa – nice! I never scrolled all the way to the bottom and didn’t know this was a thing! I’ll update the section and give you credit.
Really great review on this unique product. I’ve been considering getting this add-on, but because of cost and not knowing how well it works I hesitated. I’m now considering again to get the unit. Thanks.
As someone who has owned a S5 Bundle for about 18 months, I have mixed feelings about the Material Station. Yes it’s extremely convenient and when it works it’s wonderful, but is it worth $3,300… no way. First major problem is it dries out the filament TOO MUCH, especially soluble materials like PVA. I’ve placed a permanent sensor inside the cabinet and the humidity goes well below 20% at time (your mileage may vary). So now if I’m not printing everyday I remove the PVA inside the MS to keep it more pliable. So consider the MS as nothing more then a “dehydrator” with no timer or sophisticated controls.
I don’t know how many times I’ve had to dismantle the MS to unclog broken pieces of PVA… granted I’m good at it now, but spending hours futzing with it is a PIA. The cabinet design forces you to turn it on it’s head to remove the bottom plate, which is nothing more then cheap plastic. So you first need to remove both the S5 and Air Station. Then you’ll need remove ALL the spools just to turn it over, then remove the flimsy bottom panel to gain access to the diverter system. No forethought what so ever in giving the end user access to the complicated workings inside. The exit Bowen Tubes from the “diverter” have very tight radii so dried filaments can and will crack easily and often. Also some of my RFID sensors don’t register any of the Ultimaker spools, let alone 3rd party materials and all of them suffer from showing the bay empty when there’s plenty of Filament left on the spools.
I’ve been very patient waiting for the folks at Ultimaker to fix some of these issues, but every firmware update seems to make matters worse. One of their big fixes is to recoil all the filaments back into the MS after a 60 minute delay when the print finishes. But this made it worse… since it the over drying is the reason for all the breakage.
Bottom line is that the Ultimaker MS makes the S5, a great printer on it’s own, a little better most times, but when it gets it nose out of joint you’ll pay dearly for it in time and frustration.
Great points, and I agree. FWIW I’ve totally given up on Ultimaker PVA. Since moving to Matterhackers Pro PVA I’ve had no problems with the PVA breaking. The Ultimaker stuff is just too damn brittle out of the box and as you say – the dehydration just makes it worse.
I have been incredibly frustrated with the material station. When it works, it’s wonderful. But…man, when filament breaks, or one little thing goes wrong, it takes a frustratingly long time to fix the issue. While I love not having to turn the machine around (again, when it WORKS…when I have to fix it, that’s no longer the case), I am spending SO MUCH MORE TIME setting up files and selecting things. On the Ultimaker 2 extended +, prints just…start. I miss that. For all the trouble that this machine has caused me, I honestly don’t know if it’s worth it.